
Are you a beginner at sewing but want to try making a pair of shorts for your 4-year-old? Don't worry, with a little guidance, you can create a cute and comfortable pair of short pants that your child will love. This step-by-step guide will take you through the process, from selecting the fabric to adding those final finishing touches. Get ready to unleash your creativity and make something special for your little one!
| Characteristics | Values |
|---|---|
| Size | 4 years old |
| Type | Short pants |
| Material | Cotton |
| Elastic Waistband | Yes |
| Pockets | 2 |
| Closure | Button and zipper |
| Hem | Folded and stitched |
| Length | Knee-length |
| Color | Any |
| Pattern | Optional |
| Sewing Skill Level | Beginner |
| Tools Required | Sewing machine, scissors, pins, measuring tape, thread, iron |
| Measurements | Waist, hips, inseam, rise |
What You'll Learn
![]()
Gathering Supplies and Materials for the Short Pants Project

To create a pair of short pants for a 4-year-old, you will need a few essential supplies and materials. Here is a detailed guide on gathering everything you need for this beginner's sewing project:
Measurement:
- Have the child stand up straight with their legs slightly apart.
- Measure around their waist using a measuring tape.
- Measure the length from their waist to where you want the shorts to end.
- Measure the width of their leg by wrapping the measuring tape around the fullest part of their thigh.
- Write down these measurements as they will guide you throughout the project.
Fabric:
- Choose a lightweight and breathable fabric suitable for the season.
- Good options include cotton, linen, or chambray.
- Consider patterns or solid colors based on the child's preference.
- Purchase enough fabric according to the measurements you took plus a little extra for seam allowances and potential mistakes.
Sewing machine and tools:
- Have a sewing machine ready for this project. If you don't own one, you can borrow or rent.
- Collect basic sewing tools such as fabric scissors, pins, a seam ripper, measuring tape, thread, and a marking pencil or chalk.
- It's also useful to have an iron and ironing board for pressing seams.
Notions:
- Choose suitable closures for the shorts, such as buttons or snaps.
- Buy a length of elastic that matches the waist measurement.
- If you prefer, select a coordinating thread color or a contrasting thread for decorative purposes.
Optional extras:
- You might want to add pockets to the shorts. In that case, gather small pieces of coordinating fabric.
- Additionally, consider trims or ribbons to give the shorts a personal touch.
Preparing the fabric:
- Wash and dry the fabric to avoid any shrinkage after sewing.
- Iron the fabric to remove any wrinkles and create a smooth surface for cutting.
By gathering these supplies and materials in advance, you will ensure a smooth and hassle-free sewing project. Once you have everything at hand, you'll be ready to move on to the next steps and start creating stylish and comfortable shorts for your 4-year-old!
How to Rock Drawstring Pants with Suspenders: A Stylish Combination
You may want to see also
![]()
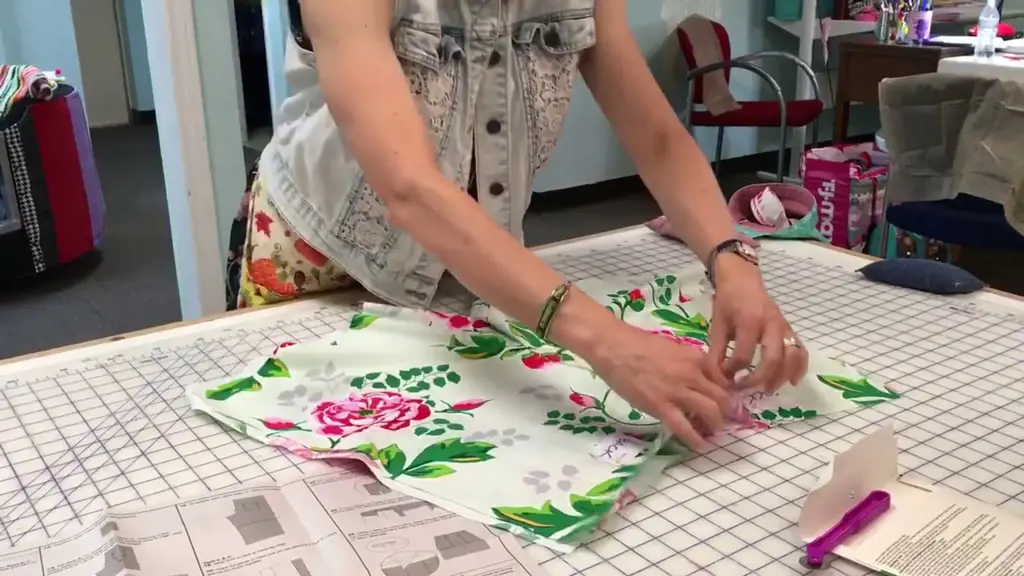
Measuring and Cutting the Fabric for the 4-year-old's Short Pants

Making clothing for children can be a rewarding and fun project, especially when it comes to making a pair of shorts for a 4-year-old. Whether you're a beginner or an experienced sewist, creating a pair of shorts for a child is a great way to practice your skills and make something personalized. In this blog post, we'll guide you through the process of measuring and cutting the fabric for the 4-year-old's short pants.
Before you get started, you'll need a few supplies:
- Fabric: Choose a lightweight and breathable fabric, such as cotton or linen, that is comfortable for your child to wear.
- Measuring tape: This will help you get accurate measurements of your child's waist, hips, and inseam.
- Pattern or template: You can use an existing pair of shorts or find a free pattern online.
- Scissors: Make sure they are sharp and suitable for cutting fabric.
Now, let's begin!
Step 1: Take Measurements
Start by measuring your child's waist, hips, and inseam. The waist measurement should be taken at the natural waistline, which is usually the narrowest part of their torso. The hip measurement should be taken around the fullest part of their hips, and the inseam measurement should be taken from the crotch to just below the knee or desired length.
Step 2: Prepare the Fabric
Lay the fabric out on a flat surface, making sure it is folded in half with the right sides facing each other. If your fabric has a pattern, make sure it is facing the right way. Smooth out any wrinkles or folds to ensure accurate cutting.
Step 3: Place and Pin the Pattern
Place the pattern or template onto the fabric, making sure to align any straight edges with the fabric's grain line. If using an existing pair of shorts as a template, make sure to leave enough seam allowance around the edges. Pin the pattern to the fabric to secure it in place.
Step 4: Cut the Fabric
Using your scissors, carefully cut around the pattern, following the outline. Take your time and be precise to ensure clean edges and accurate sizing. Remove any pins that may be in the way as you cut.
Step 5: Transfer any Markings
If your pattern or template includes markings such as pockets, buttonholes, or darts, make sure to transfer these onto the fabric using fabric chalk or washable marker. These markings will help guide you during the sewing process.
Step 6: Repeat for the Second Leg
After cutting the first leg, unfold the fabric and repeat steps 3 to 5 to cut the fabric for the second leg. Make sure the fabric is still folded in half with right sides facing each other before cutting.
Congratulations! You have successfully measured and cut the fabric for the 4-year-old's short pants. Now you're ready to move on to the next step – sewing the shorts together. Check out our next blog post for a detailed guide on sewing the shorts and adding finishing touches.
Remember, practice makes perfect, so don't be discouraged if your first attempt doesn't turn out exactly as you imagined. Each time you make something, you'll gain more experience and improve your skills. Enjoy the process and have fun creating a special pair of shorts for your little one!
Choosing the Perfect Dress Pant Color: A Complete Guide
You may want to see also
![]()
Sewing the Short Pants Together using a Sewing Machine
Making short pants for your 4-year-old can be a fun and rewarding project. With a sewing machine, you can easily create a cute and custom pair of shorts for your little one. In this guide, we will walk you through the step-by-step process of sewing the short pants together using a sewing machine.
Materials needed:
- Fabric for the shorts
- Sewing machine
- Thread
- Scissors
- Pins
- Measuring tape
- Elastic
- Safety pin
Step 1: Preparing the fabric
Start by prewashing and ironing the fabric to ensure that it is clean, soft, and free of wrinkles. Then, fold the fabric in half, making sure that the right sides are facing each other. This will create a double layer of fabric.
Step 2: Cutting the fabric
Using a pair of scissors, carefully cut out the fabric according to the pattern or measurement you have chosen for the shorts. Make sure to leave some extra fabric for seam allowances. You can use a measuring tape to ensure accurate measurements. Cut out two fabric pieces, one for the front and one for the back of the shorts.
Step 3: Pinning the fabric
Align the edges of the fabric pieces together, making sure that the right sides are facing each other. Secure them in place with pins, ensuring that the pins are perpendicular to the raw edges. This will prevent the fabric from shifting while sewing.
Step 4: Sewing the sides of the shorts
Using your sewing machine, set the stitch to a straight stitch and adjust the stitch length according to your preference. Sew along the pinned edges, starting from the waistband down to the hemline. Remember to backstitch at the beginning and end of the seam to secure the stitches.
Step 5: Finishing the seams
Trim the excess fabric from the seams, leaving a small seam allowance. This will help reduce bulk and make the finished shorts more comfortable to wear. You can also use pinking shears or a serger to finish the raw edges and prevent fraying.
Step 6: Creating the waistband casing
Fold down about 1 inch of fabric along the top edge of the shorts to create a waistband casing. Pin it in place, leaving a small opening to insert the elastic later. Sew along the folded edge, leaving the opening for the elastic.
Step 7: Inserting the elastic
Measure your child's waist and cut the elastic to the desired length, adding an extra inch for overlap. Attach a safety pin to one end of the elastic and feed it through the waistband casing, carefully maneuvering it all the way around until it comes out of the opening. Overlap the ends of the elastic and sew them securely together.
Step 8: Closing the waistband casing
Sew the opening of the waistband casing closed, making sure to catch the elastic securely in place. Test the shorts on your child to ensure a comfortable fit.
Step 9: Hemming the shorts
Fold up the bottom edge of the shorts by about 1 inch and press it with an iron. Then, fold it up again by another 1 inch, encasing the raw edge. Pin it in place and sew along the folded edge to create a neat and secure hem.
Congratulations! You have successfully sewn together a pair of short pants for your 4-year-old using a sewing machine. Now, your little one can enjoy their new custom-made shorts. Remember, practice makes perfect, so don't be afraid to try different fabrics and patterns to create unique and stylish shorts for your child!
Stylish and Versatile: Rocking Ankle Pants with Flats for Effortless Fashion
You may want to see also
![]()
Adding Elastic and Finishing Touches to the Short Pants

Once you have sewn together the main parts of the short pants for your 4-year-old, it's time to add the finishing touches. In this tutorial, we will show you how to add an elastic waistband to the pants and give them a professional look.
Here's what you'll need:
- Sewing machine
- Elastic band (approximately 1 inch wide)
- Safety pin
- Iron
- Scissors
Step 1: Measure and cut the elastic
Measure your child's waist and subtract about 1 inch from the measurement. This will ensure a snug but comfortable fit for the elastic waistband. Cut the elastic to this length using your scissors.
Step 2: Sew the ends of the elastic together
Place the ends of the elastic together, overlapping them by about 1 inch. Pin the ends together to keep them in place. Use a sewing machine to stitch a rectangle about 1 inch by 1 inch, securing the ends of the elastic together.
Step 3: Attach the elastic to the waistband
Fold the top edge of the pants over by about 1 inch to create a casing for the elastic. Press the fold with an iron to make it crisp. This will make it easier to sew.
Insert the safety pin through one end of the elastic and close it. Guide the safety pin through the casing, making sure it doesn't twist. Continue sliding the safety pin until it comes out of the other end of the casing.
Step 4: Secure the elastic in place
Once the elastic is all the way through the casing, overlap the ends by about 1 inch. Pin them together to keep them in place.
With the elastic pulled tight, stitch a rectangle around the overlapped area to secure the ends of the elastic. Make sure the stitch is strong enough to withstand wear and tear.
Step 5: Close the waistband casing
Fold the fabric of the waistband back down over the elastic so that it encloses the elastic completely. Press the fold with an iron to make it crisp.
Starting on one side seam, stitch all the way around the waistband, about 1/4 inch from the folded edge. This will close the casing and give the waistband a finished look.
Step 6: Finish the hems
If you haven't done so already, finish the hems of the short pants by folding the fabric under twice and stitching it in place. This will prevent the fabric from fraying and give the pants a polished appearance.
Repeat the hemming process for both pant legs.
And there you have it! By following these simple steps, you can add an elastic waistband and finish the short pants for your 4-year-old. Now your little one can enjoy their new shorts in style and comfort.
Size Chart Guide: American Eagle Jogger Pants - Find Your Perfect Fit
You may want to see also
Frequently asked questions
To make 4-year-old short pants, you will need fabric, a sewing machine, thread, scissors, elastic, and a sewing pattern.
Sewing patterns for children's clothing can be found at fabric stores, online sewing pattern retailers, or in sewing pattern books.
To measure a 4-year-old for short pants, take measurements of their waist, hips, and inseam. Use these measurements to choose the correct size pattern or adjust an existing pattern to fit.
While using a sewing machine may make the process faster and more efficient, it is possible to hand sew short pants for a 4-year-old. However, it may take longer and require more patience.


