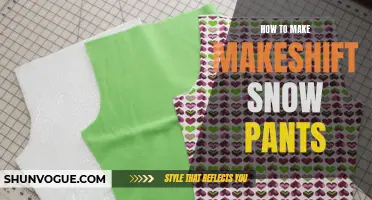
Are you tired of uncomfortable and restrictive pants? Do you find it difficult to find the perfect fit for your waistline? Look no further! In this guide, we will show you how to make your own elastic waste pants pattern. By following these easy steps, you'll be able to create a pair of pants that are not only stylish but also incredibly comfortable to wear. Get ready to say goodbye to ill-fitting pants and hello to the perfect fit for your body. Let's get started!
| Characteristics | Values |
|---|---|
| Material | Elastic waste |
| Pattern type | Pants |
| Size range | XS to XL |
| Waistband type | Elastic |
| Seam type | Overlock |
| Hem type | Rolled |
| Pocket type | Side |
| Closure type | None |
What You'll Learn
![]()
Introduction to making elastic waste pants pattern

Making your own clothes can be a rewarding and fulfilling hobby. One of the simplest garments to start with is elastic waist pants. They are comfortable, versatile, and easy to make. In this guide, we will walk you through the process of creating your own elastic waist pants pattern.
Materials you will need:
- Measuring tape
- Pattern paper
- Pencil
- Ruler
- Scissors
- Fabric of your choice
- Sewing machine (or needle and thread)
Step 1: Take measurements
Start by taking accurate measurements of your waist, hips, and inseam. Use a measuring tape and make sure to measure around the fullest part of each area. Write down these measurements for reference later.
Step 2: Draw the pattern
Using pattern paper, draw a rectangular shape with the width equal to half of your waist measurement plus ease. This ease is usually 2-3 inches for comfort. The length of the rectangle should be the desired length of your pants plus seam allowances.
Step 3: Add the crotch curve
At the top corners of the rectangle, draw a slightly curved line connecting them. This will be the crotch curve. The depth of the curve will depend on your hip measurement.
Step 4: Create the waistband
Using your waist measurement, draw a separate rectangle that is two times the desired height of the waistband. This will be folded in half later. The width should be the same as the width of your pants pattern.
Step 5: Cut out the pattern
Using scissors, carefully cut out the pants pattern, including the crotch curve. Cut out the waistband as well.
Step 6: Prepare your fabric
Lay your fabric flat and fold it in half, with right sides together. Place your pattern pieces on the fabric, making sure to align the straight grainline of the fabric with the grainline marked on the pattern. Pin the pattern pieces in place.
Step 7: Cut out the fabric
Using your scissors, carefully cut out the fabric following the outline of the pattern pieces. Make sure to cut through both layers of fabric.
Step 8: Sew the pants
With right sides together, sew the inseam of the pants using a straight stitch. Press open the seam allowance.
Step 9: Sew the waistband
Fold the waistband in half lengthwise, with wrong sides facing. Sew the short ends together using a straight stitch. Press the seam open.
Step 10: Attach the waistband
Fold the waistband in half widthwise, with wrong sides together. Align the raw edges of the waistband with the top edge of the pants, matching the side seams. Pin in place and sew using a straight stitch, leaving a small opening to insert the elastic.
Step 11: Insert the elastic
Measure the elastic to a comfortable length for your waist, making sure it is slightly smaller than your waist measurement. Attach a safety pin to one end of the elastic and feed it through the waistband, being careful not to twist it. Overlap the ends of the elastic by about an inch and sew them together securely.
Step 12: Finish the waistband
Close the opening in the waistband by sewing it closed with a straight stitch. Make sure the elastic is evenly distributed within the waistband.
Step 13: Hem the pants
Fold the bottom hem of the pants twice, towards the wrong side, and sew it in place using a straight stitch.
Congratulations, you have successfully created your own elastic waist pants! Customize them by choosing different fabrics, adding pockets, or adjusting the length. With practice and experience, you can easily modify the pattern to create pants of various styles and fits. Enjoy your new handmade garments!
Creating a Flattering Fit: How to Add a Princess Seam to a Pant Leg
You may want to see also
![]()
Materials and tools needed for creating the pattern

When making elastic waist pants, it is important to start with a well-fitted pattern. Creating your own pattern allows you to customize the fit to your body, ensuring maximum comfort. In this blog post, we will discuss the materials and tools needed to create the pattern for elastic waist pants.
Materials:
- Pattern paper or tracing paper: This is essential for transferring your measurements onto the paper and creating the pattern. Pattern paper is preferable as it is sturdier and can withstand repeated use.
- Measuring tape: Accurate measurements are crucial for creating a well-fitting pattern. A flexible measuring tape is the best tool for taking body measurements.
- Ruler: A ruler with both straight and curved edges is useful for drawing straight lines and curves on your pattern.
- Pencil or pen: A pencil or pen is necessary for marking your measurements and drawing the lines on your pattern. Make sure to use a tool that is easily visible on the pattern paper.
- French curve: A French curve is a tool with curved edges that is used for drawing smooth lines on patterns. This is particularly useful for creating the shape of the waistband and the curve of the crotch area.
Tools:
- Scissors: You will need a pair of sharp scissors for cutting out your pattern. It is important to have a dedicated pair of fabric scissors that are only used for cutting fabric and patterns.
- Paper scissors: A pair of paper scissors is necessary for cutting the pattern paper. Using fabric scissors for cutting paper can dull the blades.
- Tape: Tape is used to join multiple pieces of pattern paper together. Clear tape or drafting tape is recommended, as it allows you to see and trace the lines on the pattern.
- Pattern weights or pins: Pattern weights or pins are used to hold the pattern paper in place while you trace and cut. Pattern weights are ideal as they do not damage the pattern paper. However, if you do not have pattern weights, regular pins can be used.
- Tracing wheel and carbon paper (optional): A tracing wheel and carbon paper can be used to transfer the pattern markings onto the fabric. This is especially helpful if you plan on making multiple pairs of pants using the same pattern.
With these materials and tools, you will be well-equipped to create your own pattern for elastic waist pants. The next step will be to take your measurements and start drafting the pattern. Stay tuned for our next blog post on how to draft the pattern for elastic waist pants!
Can a Navy Jacket Be Worn with Black Pants?
You may want to see also
![]()
Step-by-step instructions for making the elastic waste pants pattern

Elastic waist pants are comfortable and versatile, making them a popular clothing choice for both children and adults. Whether you are making pants for yourself or someone else, creating a pattern is essential to ensure a proper fit. In this guide, we will walk you through the step-by-step process of making an elastic waist pants pattern that you can use to sew your own custom-fit pants.
Materials and Tools Needed:
- Tracing paper or pattern paper
- Measuring tape
- Ruler
- Pencil or pen
- Scissors
Step 1: Take Measurements
The first step in creating an elastic waist pants pattern is to take accurate measurements of the person who will be wearing the pants. Start by measuring the waist circumference, hip circumference, and the desired length of the pants. Write down these measurements as they will be used later to draft the pattern.
Step 2: Create the Waistband Pattern
To create the waistband pattern, start by folding your tracing paper or pattern paper in half lengthwise. On the folded edge, mark a point equal to half of the waist circumference plus an additional inch for ease. For example, if the waist circumference is 30 inches, mark a point at 16 inches (30/2 + 1) from the folded edge.
From the marked point, measure down the desired width of the waistband, usually around 1.5 to 2 inches, and mark another point. Connect the two points with a straight line. This line represents the top edge of the waistband.
Next, measure down from the top edge the desired height of the waistband, typically around 1 inch, and mark a third point. From this point, measure down the desired length of the pants and mark a fourth point. Connect the third and fourth points with a straight line. This line represents the bottom edge of the waistband.
Step 3: Create the Pants Pattern
To create the pants pattern, use the waistband pattern as a reference. Start by measuring down from the bottom edge of the waistband pattern the desired length of the pants and mark a point. From this point, measure the hip circumference plus an additional inch for ease, and mark another point.
On the folded edge of the paper, mark a point equal to half of the hip circumference plus an additional inch for ease. For example, if the hip circumference is 40 inches, mark a point at 21 inches (40/2 + 1) from the folded edge.
Next, connect the two points on the folded edge with a straight line. This line represents the side seam of the pants. From the bottom point, measure inwards the desired width of the pants at the hem, usually around 2 inches, and mark a third point on the side seam. Connect this point with the bottom point using a slightly curved line to create a classic pants shape.
Step 4: Cut and Label Your Pattern
Once you have completed drafting the waistband and pants patterns, carefully cut them out using a pair of scissors. Make sure to label each piece (e.g., front waistband, back waistband, front pants, back pants) to avoid confusion during the sewing process.
Step 5: Test and Adjust
Before cutting your fabric, it is advisable to make a test garment using inexpensive fabric or muslin. Sew the test garment together and have the person try it on to check the fit. Make any necessary adjustments to the pattern, such as taking in or letting out seams, before proceeding to cut your final fabric.
With these step-by-step instructions, you can create your own elastic waist pants pattern. Whether you are making pants for yourself or as a gift, this customized pattern will ensure a perfect fit every time. Happy sewing!
How to Remove Lint from Black Pants
You may want to see also
![]()
Tips and variations for customizing the pattern to fit your style

When it comes to making elastic waist pants, there are many possibilities for customizing the pattern to fit your personal style. Whether you prefer a certain length, waistband width, or even the type of fabric, these tips and variations will help you create the perfect pair of pants:
- Length variations: Depending on your preference, you can easily adjust the length of the pants. For longer pants, simply extend the pattern below the knee to your desired length, making sure to add extra fabric for hemming. For shorter pants, trim the pattern accordingly.
- Waistband width: If you prefer a wider or narrower waistband, you can easily modify the pattern. To make a wider waistband, simply add extra width to the top of the pattern, making sure to adjust the length of the elastic accordingly. For a narrower waistband, trim the pattern accordingly.
- Pockets: Adding pockets to your elastic waist pants is a great way to add functionality and style. You can choose from various pocket options such as side-seam pockets, patch pockets, or even welt pockets. Simply modify the pattern to accommodate the pockets of your choice and follow a pocket sewing tutorial to add them to your pants.
- Tapered legs: If you prefer a more fitted look, you can taper the legs of your pants. To do this, start by marking the desired width at the bottom of the leg on the pattern and gradually narrow it towards the knee. Make sure to adjust both the front and back leg pattern pieces to achieve a symmetrical look.
- Fabric variations: The type of fabric you choose can greatly affect the overall look and feel of your pants. For a casual and comfortable pair of pants, choose a soft and breathable fabric such as cotton or linen. If you want a more formal look, consider using a stretch suiting fabric or even a satin fabric. Just make sure to choose a fabric that has some stretch to ensure a comfortable fit with the elastic waistband.
- Embellishments: Adding embellishments to your pants can take them to the next level. Consider using decorative trims, such as lace, ribbon, or even piping, to add a unique touch to the waistband or side seams. You can also experiment with embroidery or appliqué to create a personalized design on the pants.
Remember, before cutting and sewing your fabric, always make a mock-up or toile using affordable fabric or muslin. This will give you a chance to test the fit and make any necessary adjustments to the pattern before using your desired fabric. With these tips and variations, you can create a pair of elastic waist pants that perfectly fits your style and preferences.
Is It Appropriate to Wear Pants to the Races? Exploring Fashion Etiquette at Racecourses
You may want to see also
Frequently asked questions
To take measurements for making elastic waist pants, you will need to measure your waist circumference, hip circumference, and inseam length. Use a measuring tape to measure around the narrowest part of your waist for the waist circumference, the widest part of your hips for the hip circumference, and from your crotch to the desired length for the inseam length.
The best fabric for making elastic waist pants is one that has a good amount of stretch and drape. Fabrics like jersey knit, cotton spandex blend, or denim with stretch can work well. It's important to choose a fabric that is comfortable to wear and can hold the shape of the pants.
To create a pattern for elastic waist pants, you can start by drawing a basic pant shape on a large sheet of paper. Use your waist and hip measurements to adjust the width of the waist and hips. Decide on the desired rise and inseam length to further customize the pattern. Draw a smooth curve from the waist to the hip, and from the hip to the hemline. Add seam allowances and a waistband casing for the elastic. Cut out the pattern and use it to trace onto your fabric.
To sew elastic waist pants, start by sewing the inseams together and then the side seams using a straight stitch. Finish the raw edges with a zigzag stitch or a serger. Fold down the top of the pants to create a waistband casing, leaving a small opening to insert the elastic. Measure and cut a piece of elastic that fits comfortably around your waist, and use a safety pin to guide it through the casing. Sew the elastic ends together and close the waistband casing opening. Hem the bottom of the pants, and your elastic waist pants are complete.