Do you want to unleash your inner Saiyan and achieve Goku's iconic look? Well, look no further! In this guide, we will teach you how to make your very own Goku pants, so you can feel like a true warrior and join Goku on his incredible adventures. Get ready to channel your inner Super Saiyan and level up your fashion game!
| Characteristics | Values |
|---|---|
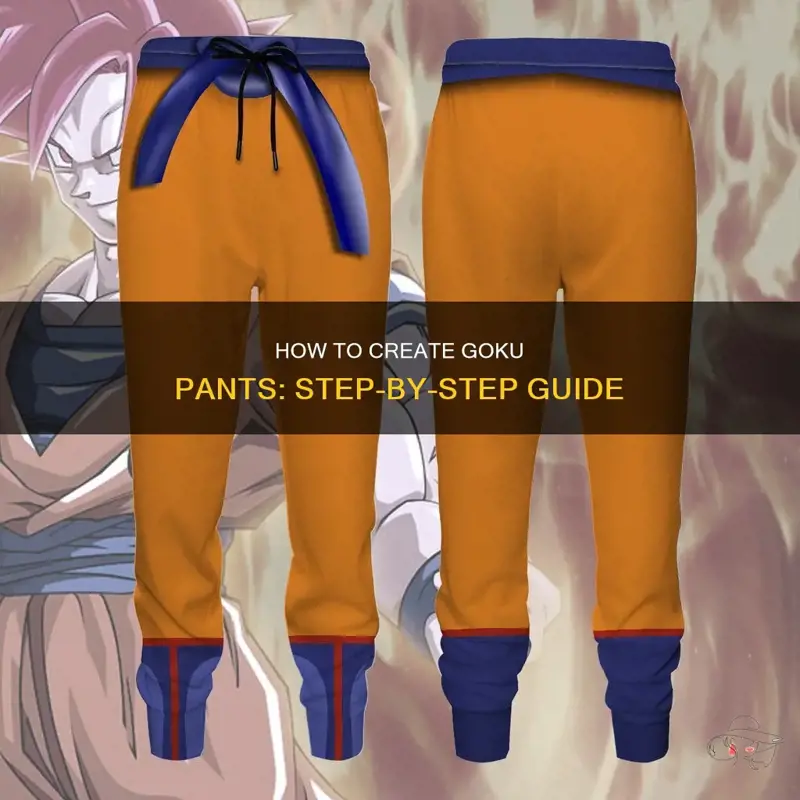
| Material | Cotton or polyester blend |
| Color | Orange |
| Length | Full length |
| Waistband | Elastic |
| Closure | Drawstring |
| Design | Baggy style |
| Features | Goku symbol or logo |
| Pockets | Multiple pockets |
| Wash instructions | Machine washable, air dry recommended |
| Sizing options | XS, S, M, L, XL, XXL |
| Price range | $20 - $50 |
| Occasion | Casual or costume |
| Brand options | Licensed brands such as Banpresto or Great Eastern Entertainment |
| Availability | Sold in stores or online |
| Care instructions | Do not bleach or iron |
| Supplier options | Clothing retailers or online marketplaces |
| Recommended outfit | Pair with a Goku t-shirt or hoodie |
| Recommended footwear | Sneakers or sandals |
| Style inspiration | Dragon Ball Z anime |
| Celebrity fans | Numerous celebrities have been seen wearing Goku pants |
| Comfort level | Provides freedom of movement and breathability |
| Durability | Long-lasting and resistant to wear and tear |
| Trendiness | Popular among anime fans and streetwear enthusiasts |
| Customization | Can be personalized with patches or embroidery |
| Cultural significance | Represents the iconic character Goku from Dragon Ball Z series |
| Fashion-forward | Adds a unique and edgy touch to any outfit |
What You'll Learn
![]()
Materials needed for making Goku pants

If you're a Dragon Ball Z fan, you may have dreamt of cosplaying Goku, the iconic Saiyan warrior. One of the most recognizable features of Goku's outfit is his orange pants. Making Goku pants can be a fun and rewarding project for cosplay or even just casual wear. Here are the materials you'll need to bring Goku's pants to life:
- Orange fabric: Look for a medium-weight fabric with a slight stretch to mimic Goku's pants accurately. Some suitable options include cotton twill, denim, or even a blend like cotton/polyester. Make sure the fabric is a vibrant shade of orange to match Goku's signature style.
- Sewing machine: While you may be able to sew the pants by hand, using a sewing machine will save time and ensure a more professional-looking result. If you don't have a sewing machine, consider borrowing one or using a local sewing studio.
- Thread: Choose a thread color that closely matches the orange fabric. It's essential to have a sturdy thread that won't easily break, as Goku's pants will undergo some movements.
- Elastic: You'll need elastic to create a comfortable and fitted waistband for the pants. Opt for a wide elastic, around 1 inch, to provide enough support and keep the pants in place.
- Goku pants pattern: If you have experience with pattern-making, you can draft your own Goku pants pattern based on your body measurements. Otherwise, you can search online for free or commercial patterns specifically designed for Goku's pants. Ensure the pattern includes details like the reinforced knee patches and the distinctive shape of the pants.
- Scissors and pins: These basic sewing tools are essential for cutting the fabric and holding it in place. Choose sharp fabric scissors to achieve clean cuts.
- Marking tool: To mark the fabric accurately while cutting and sewing, you'll need a marking tool. Options range from tailor's chalk, washable fabric markers, or even pins to indicate important points on the fabric.
Now that you have gathered all the materials needed, it's time to bring Goku's pants to life! Follow the pattern instructions, and make sure to take your time and sew carefully. Remember to use the marking tools to indicate where darts, seams, or knee patches will go.
Once you've completed sewing the pants, add the elastic waistband according to the pattern instructions. The waistband should be snug but not too tight to allow for movement and comfort.
Finally, try on your Goku pants and make any necessary adjustments to ensure the perfect fit. You can tailor the length of the pants to your preference or add additional details like decorative patches if desired.
With these materials and a little bit of sewing know-how, you'll be able to create your own pair of Goku pants and step into the shoes of the legendary Saiyan warrior. Now go out and show the world your love for Dragon Ball Z!
Stylish Pairings: Men's Fashion with White Linen Pants
You may want to see also
![]()
Step-by-step guide to cutting and sewing the pants

Making your own Goku pants can be a fun and rewarding DIY project. Whether you're a fan of Dragon Ball or just enjoy the style, creating your own Goku pants allows you to customize them to your liking. In this step-by-step guide, we will walk you through the process of cutting and sewing Goku pants from scratch. Let's get started!
Materials you will need:
- Fabric of your choice (preferably a light to medium weight fabric such as cotton or linen)
- Sewing machine
- Thread in a matching color
- Scissors
- Pins
- Measuring tape
- Elastic band (optional, if you want to add an elastic waistband)
Step 1: Taking accurate measurements
Start by measuring your waist, hips, inseam, and the desired length of your Goku pants. These measurements will determine the size of your pattern pieces. Write down your measurements and keep them handy throughout the process.
Step 2: Creating the pattern
To create the pattern for your Goku pants, you will need to cut out several pieces of fabric. Start by drafting a rectangular piece for the waistband. Its width should be equal to your waist measurement plus seam allowance, and its length should be your desired waistband depth multiplied by two.
Next, cut out two identical pieces for the front and back of the pants. These will be wider at the top (hip area) and narrower at the bottom (ankle area). Use your hip measurement to determine the width of these pieces, making sure to leave enough room for comfort and ease of movement. The length should be your desired length minus the waistband depth, multiplied by two.
Lastly, cut out two rectangular pieces for the cuffs. These will be attached to the bottom of the pants to create a gathered look. The width of the cuffs should be equal to the ankle measurement plus seam allowance, and the length can be determined based on your desired cuff width.
Step 3: Sewing the waistband
Fold the waistband piece in half lengthwise with the right sides facing each other. Pin the two long edges together and sew them using a straight stitch, leaving a small opening for inserting the elastic band (if using). Fold the waistband in half widthwise, aligning the raw edges, and sew the ends together to create a loop.
Step 4: Assembling the pants
Take one front piece and one back piece and place them right sides together. Pin the inseams (inner leg seams) and the crotch seam. Sew along these seams using a straight stitch. Repeat this step with the other front and back pieces.
Step 5: Attaching the cuffs
Fold each cuff piece in half lengthwise with the right sides facing each other. Sew the short ends together to create loops. Turn the cuffs right side out and press them flat.
With the pants inside out, slip each cuff around the bottom of the pant legs, aligning the raw edges. Make sure the gathered side of the cuff is facing the pant leg. Pin the cuffs in place and sew them with a straight stitch.
Step 6: Adding the waistband
Slip the waistband over the top of the pants, aligning the raw edges. If using elastic, insert it through the opening in the waistband, secure the ends together, then sew the opening closed. Pin the waistband in place, ensuring it's evenly distributed around the pants, and sew it using a straight stitch.
Step 7: Finishing touches
Trim any excess threads and give your Goku pants a final press with an iron to give them a polished look.
Congratulations! You have successfully cut and sewn your own pair of Goku pants. Try them on, make any necessary adjustments, and enjoy showing off your handmade creation. Feel free to experiment with different fabrics, colors, and embellishments to make these pants uniquely yours.
Matching Pants to Your Black Sportcoat: A Stylish Guide
You may want to see also
![]()
Adding the iconic Goku symbols to the pants

To truly replicate Goku's signature style, it's essential to not only create the pants that resemble his outfit but also to add the iconic Goku symbols to them. These symbols bring together the entire look and add the perfect finishing touch. In this guide, we will walk you through the process of adding these symbols to your Goku pants.
Here's what you'll need:
- Goku pants (preferably in the appropriate color scheme)
- White fabric paint or fabric markers
- Stencils or printed Goku symbols for reference
- Paintbrushes (if using fabric paint)
- Painter's tape (optional)
Now, let's get started:
Step 1: Prepare your workspace
Find a clean and well-lit area to work on your pants. Lay them flat on a table or any other suitable workspace. Make sure you have all your materials handy and within reach.
Step 2: Choose the Goku symbols
Decide which Goku symbols you want to add to your pants. These symbols can include the iconic "亀" (kame) symbol, representing the Turtle School, or the "界王" (Kaiō) symbol denoting King Kai's influence. You can find pre-made stencils or print out the symbols to use as a reference.
Step 3: Position the stencils or draw the symbols
If using stencils, place them on the desired spots of your pants. Ensure they are centered and straight by using a ruler or measuring tape. If you prefer drawing freehand, lightly sketch the symbols using a pencil. Remember, practice makes perfect, so don't worry if your first attempt isn't perfect.
Step 4: Apply fabric paint or use fabric markers
If using fabric paint, dip a paintbrush into the paint and carefully fill in the Goku symbols on your pants. Start from the center of the symbol and work your way outwards. This technique helps prevent the paint from bleeding. Take your time and use small, even strokes for a neat finish.
Alternatively, you can use fabric markers to trace and color the symbols. Fabric markers provide more control and precision, making them an excellent choice if you're not confident with a paintbrush.
Step 5: Let the paint dry
Allow the fabric paint to dry completely before moving or touching the pants. Follow the drying instructions on the paint bottle for the best results. Typically, fabric paint may take a few hours to fully dry, but it's best to wait overnight for it to set properly.
Step 6: Optional touch-up
Once the paint is dry, check for any areas that may need touch-ups. If the symbol appears uneven or lacks vibrancy, carefully apply additional layers of paint or color with fabric markers. Take your time to ensure a clean and consistent look.
Step 7: Use painter's tape (optional)
If you want to go the extra mile and add some professional flair to your Goku pants, you can use painter's tape to create clean and straight lines around the symbols. This technique is particularly useful for creating borders or separating different sections of a symbol. Apply the tape around the desired areas, ensuring it adheres well to the fabric.
Step 8: Final touches
Inspect your completed Goku symbols to ensure they match your expectations. Make any final touch-ups or adjustments if necessary. If you used painter's tape, carefully remove it after you're satisfied with the results.
And voila! You have successfully added the iconic Goku symbols to your pants. Wear them with confidence and channel your inner Saiyan warrior. Remember, practice and patience are key, so don't be discouraged if it takes a few attempts to achieve your desired outcome. Have fun and enjoy showcasing your DIY Goku pants!
How to Find Snap Track Pants: A Complete Guide
You may want to see also
![]()
Tips for customizing and styling your Goku pants

Goku pants, also known as harem pants or parachute pants, are a popular clothing item inspired by the iconic Dragon Ball character Goku. These pants are loose-fitting and comfortable, perfect for casual wear or as a statement piece for cosplay. If you want to customize and style your own Goku pants, here are some tips to get you started:
Choose the right fabric:
Look for lightweight and breathable fabrics like cotton, linen, or rayon to ensure comfort and ease of movement.
Take accurate measurements:
- Measure your waist, hips, inseam, and desired length for the pants to ensure a proper fit.
- Add extra length for the gathered waistband and cuffs if desired.
Create a pattern:
- Use an existing pair of pants or create your own pattern by taking the measurements and transferring them onto pattern paper.
- Remember to include seam allowances for sewing.
Cut out the fabric:
- Lay out your chosen fabric on a flat surface and pin the pattern pieces onto it.
- Carefully cut around the pattern pieces, ensuring smooth and accurate edges.
Sew the pants:
- Start by sewing the inner leg seams together, right sides facing each other.
- Press open the seam allowances to reduce bulk and ensure a neat finish.
- Sew the crotch seam, again with right sides facing each other, and press the seam open.
- Next, fold over the top edge of the pants to create a casing for the waistband. Sew along the folded edge, leaving a small opening to insert elastic later.
Add a waistband:
- Measure and cut a length of elastic that fits your waist comfortably.
- Attach a safety pin to one end of the elastic and thread it through the casing using the small opening.
- Once the elastic is threaded through, sew the two ends of the elastic together securely.
- Close the opening in the casing with a few stitches.
Create the gathered cuffs:
- Measure your ankle circumference and add a few extra inches for ease and gathering.
- Cut two rectangular pieces of fabric according to this measurement.
- Fold each piece in half lengthwise and sew the short edges together, creating a loop.
- Fold over the top edge of each loop to create a casing for the elastic and sew along the folded edge, leaving a small opening.
- Thread the elastic through the casing using the same method as for the waistband, sew the ends together, and close the opening.
Hem the pants:
- Try on the pants and mark the desired length.
- Fold the fabric twice towards the inside to create a clean hem and sew it in place.
Customize with embellishments:
- You can make your Goku pants unique by adding embellishments like decorative trims, patches, or embroidery.
- Use fabric paints or fabric markers to create Goku-themed designs, symbols, or kanji characters on the pants.
Style your Goku pants:
- Pair your Goku pants with a simple fitted t-shirt or tank top for a casual look.
- Add a belt or a sash to define your waist and create a more structured silhouette.
- For a cosplay outfit, complete the look with a Goku-inspired wig and accessories like wristbands or a belt pouch.
By following these tips, you can create your own Goku pants and personalize them to suit your style. Have fun experimenting with different fabrics, colors, and designs to make a truly unique pair of pants inspired by your favorite Dragon Ball character!
Maximizing Comfort and Style: Can You Alter Pant Legs to Fit?
You may want to see also
Frequently asked questions
To make Goku pants, you will need a pair of loose-fitting orange pants and blue fabric paint. Begin by washing and drying the pants to ensure they are clean. Then, use the blue fabric paint to freehand paint Goku's symbol, a "Kanji" character, on the left leg of the pants. Let the paint dry completely before wearing.
You can find orange pants for making Goku pants at various clothing stores, both online and in-person. Look for loose-fitting pants in a solid orange color. If you can't find orange pants, you can also purchase white pants and dye them orange using fabric dye.
No, you don't need to be skilled at painting to make Goku pants. Goku's symbol is a simple "Kanji" character, which can be easily replicated using a stencil or by freehand painting. If you're not confident in your painting abilities, you can also use fabric markers or seek the help of a friend who is more experienced in painting.


