Do you want to add a touch of whimsy and eccentricity to your wardrobe? Look no further than the iconic Mad Hatter pants! Inspired by the flamboyant and outlandish style of the one and only Mad Hatter from Alice in Wonderland, these pants are a perfect way to make a fashion statement. Whether you're attending a costume party or simply want to embrace your inner eccentric, learning how to make Mad Hatter pants is an exciting DIY project that will have heads turning wherever you go. So grab your sewing kit and unleash your creativity as we dive into this Wonderland-worthy fashion adventure!
| Characteristics | Values |
|---|---|
| Fabric | Wool or cotton |
| Color | Vibrant and bold |
| Pattern | Checks or stripes |
| Waistband | High-waisted |
| Waist closures | Buttons or buckles |
| Leg shape | Wide-legged or flared |
| Hem length | Ankle-length or cropped |
| Accents | Ruffles, lace, or decorative trims |
| Embellishments | Ribbons, bows, or buttons |
| Pocket style | Patch pockets or side pockets |
| Fit | Loose or oversized |
| Styling | Pair with a tailored blazer or a printed blouse |
What You'll Learn
![]()
Choosing the Right Fabric

- Weight: Mad Hatter pants typically have a slightly heavier fabric to create the structured and exaggerated shape of the pants. Look for medium to heavyweight fabrics such as twill, brocade, or even a heavy cotton blend. Avoid lightweight fabrics that lack the necessary body.
- Texture: Mad Hatter pants often feature unique textures to enhance their whimsical and eccentric appearance. Consider using fabrics with interesting patterns or weaves such as houndstooth, tartan, or floral jacquard. This adds visual interest to the pants and captures the essence of the character.
- Drape: The drape of the fabric determines how it hangs and flows when worn. Mad Hatter pants often have a loose and billowy silhouette, so it's important to choose a fabric with good drape. Avoid stiff fabrics that don't have enough movement or flow. Instead, opt for fabrics like silk, rayon, or even softer denim blends that have a more fluid drape.
- Durability: Mad Hatter pants are often worn as part of a costume or for special occasions, so it's important to choose a fabric that can withstand wear and tear. Look for fabrics with good durability and strength, such as heavy twill or canvas blends. These fabrics are less likely to fray or tear, ensuring that your pants will last for multiple uses.
- Color and Pattern: The color and pattern of the fabric play a crucial role in capturing the essence of the Mad Hatter's flamboyant style. Choose colors and patterns that are vibrant, bold, and eclectic. Look for bright hues like purple, green, or orange, and consider patterns like stripes, checks, or jacquard designs. These elements will help create a visually striking and true-to-character pair of pants.
- Comfort: While style is important, it's essential to prioritize comfort when choosing fabric for Mad Hatter pants. Look for fabrics that are soft against the skin and provide breathability, especially if you plan on wearing the pants for an extended period. Fabrics such as cotton, linen, or blends with a touch of spandex offer both comfort and ease of movement.
Remember, fabric choice plays a significant role in the final outcome of your Mad Hatter pants. Take your time to explore different options, and don't be afraid to mix and match fabrics to achieve the desired effect. With the right fabric, you'll be one step closer to creating a show-stopping costume that truly captures the essence of the Mad Hatter's zany style.
Are Capri Pants a Flattering Choice or Do They Make You Look Fat?
You may want to see also
![]()
Taking Accurate Measurements

To make a pair of Mad Hatter pants that fit perfectly, it is essential to take accurate measurements of your body. Failing to do so can result in ill-fitting pants that may be too tight or too loose. Taking precise measurements will ensure that your pants fit comfortably and look great.
Before you begin, grab a measuring tape and wear lightweight clothing or undergarments. It's important to measure yourself without any bulky or padded clothing that could distort the measurements. Let's get started on the process of taking accurate measurements for your Mad Hatter pants:
Waist:
The waist measurement is the first step to achieving well-fitting pants. To determine your waist size, wrap the measuring tape around your natural waistline, which is the narrowest part of your torso, usually located above your belly button. Make sure the tape is snug but not tight, and parallel to the floor. Take note of the measurement in inches.
Hips:
Next, measure your hips to ensure that the pants will fit properly around this area. Wrap the measuring tape around the fullest part of your hips, typically around 7-9 inches below your waistline. Again, make sure the tape is parallel to the ground and comfortably snug. Record the measurement.
Inseam:
The inseam measurement is crucial for determining the length of your pants. Start by standing with your feet shoulder-width apart. Measure from the crotch seam (where the inseams meet) down to the desired length, which is typically at the ankle bone or slightly below. Make sure the tape is straight and taut for an accurate measurement. Write down the measurement.
Thighs:
To achieve the right fit around your thighs, measure the circumference of each thigh separately. Wrap the measuring tape around the widest part of each thigh, usually located a few inches below the crotch. Ensure the tape is parallel to the floor and snug but not tight. Note down the measurements for both thighs.
Knees:
Measure the circumference of each knee to ensure a comfortable fit. Find the midpoint of your kneecap and wrap the measuring tape around your knee, ensuring it is parallel to the floor. Record the measurements for both knees.
Calf:
Lastly, measure the circumference of each calf to finalize the pant's fit. Locate the widest part of each calf and wrap the measuring tape around it, making sure it is parallel to the floor. Note down the measurements for both calves separately.
By following these steps and taking accurate measurements, you will be able to create Mad Hatter pants that fit you perfectly. These measurements will serve as the basis for designing and sewing your pants, ensuring that the final result is both comfortable and stylish.
Master the Art of Styling Track Pants for Effortless Cool
You may want to see also
![]()
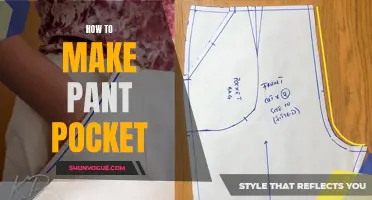
Creating a Pattern and Cutting the Fabric

To create your own Mad Hatter pants, you will first need a pattern that fits your measurements. Once you have your pattern, it's time to start cutting the fabric. Follow these steps to create your own custom Mad Hatter pants.
- Take accurate measurements: Start by measuring your waist, hips, and inseam. These measurements will help you create a pattern that fits you perfectly. Make sure to take these measurements with a measuring tape, as accuracy is crucial for a good fit.
- Draft your pattern: Using your measurements, draft a pattern for the Mad Hatter pants. Start by creating a basic pants pattern, with front and back panels. You can use a commercial pants pattern as a starting point, or create your own from scratch.
- Add the Mad Hatter details: Once you have your basic pants pattern, it's time to add the distinctive Mad Hatter details. These may include flared legs, exaggerated lengths, or asymmetrical features. Sketch out these details on your pattern, making sure to adjust the measurements accordingly.
- Choose your fabric: Now that you have your pattern, it's time to choose the fabric for your Mad Hatter pants. Look for fabrics that have the right drape and weight, such as cotton, linen, or lightweight wool. Consider the colors and prints that reflect the Mad Hatter's whimsical style.
- Prepare the fabric: Before cutting, make sure to pre-wash and press your fabric to prevent shrinkage and make it easier to work with. Also, ensure that the fabric is properly aligned if it has a print or pattern.
- Pin and cut the fabric: Lay your fabric out on a flat surface, ensuring that it is smooth and wrinkle-free. Pin your pattern pieces onto the fabric, aligning them with the grainline. Double-check the measurements and make any necessary adjustments before cutting.
- Cut with precision: Using sharp fabric scissors or a rotary cutter, carefully cut along the edges of your pattern pieces. Take your time to ensure clean and accurate cuts. It may be helpful to use pattern weights or pins to hold the fabric in place as you cut.
- Mark and label: As you cut each pattern piece, take the time to mark any necessary notches or reference points. This will make it easier to match up the pieces during the assembly process. It's also a good idea to label each piece with its corresponding number or letter.
Once you have finished cutting all the fabric pieces according to your pattern, you are ready to move on to the next step – sewing the Mad Hatter pants together. Stay tuned for the next blog post, where we will guide you through the sewing process and help you bring your Mad Hatter pants to life!
Can I Use Joggers Pants Outside? A Fashionable and Practical Choice
You may want to see also
![]()
Sewing Techniques for Mad Hatter Pants

If you're a fan of the Mad Hatter from Alice in Wonderland and want to create your own whimsical pants inspired by his unique style, you've come to the right place! In this blog post, we'll discuss step-by-step sewing techniques for making Mad Hatter pants. Get ready to unleash your creativity and add a touch of eccentricity to your wardrobe.
Materials Needed:
- Fabric of your choice (preferably with a bold or colorful pattern)
- Sewing machine
- Thread in a matching color
- Measuring tape
- Scissors
- Pins
- Elastic for waistband
- Buttons or other embellishments (optional)
Step 1: Take Measurements
Start by taking accurate measurements of your waist, hips, and inseam. These measurements will determine the size of your pants and ensure a proper fit. Additionally, measure the desired length of the pants, keeping in mind the Mad Hatter's signature look, which often features cropped or shorter pants.
Step 2: Prepare the Pattern
Using your measurements, draft a basic pants pattern on a large sheet of paper. Make sure to add seam allowances to your pattern. You can find online tutorials or use an existing pants pattern as a reference to help you create the desired silhouette, which is usually loose and slightly baggy.
Step 3: Cut the Fabric
Lay your fabric on a flat surface and carefully pin the pattern pieces to it. Pay attention to the fabric's pattern orientation if it's directional. Carefully cut around the pattern, ensuring you have two pieces for the front and back of the pants and two pieces for the pocket lining (if desired).
Step 4: Assemble the Pieces
With the right sides of the fabric facing each other, start by sewing the inner and outer leg seams of the front and back pieces together. Use a straight stitch and reinforce the crotch area for durability. Finish the raw edges with a zigzag stitch or serger to prevent fraying.
Step 5: Add Pockets
If you want to include pockets, sew the pocket lining to the front pieces of the pants. Align the pocket pieces with the pattern markings on the front pieces, ensuring the right sides are facing each other. Stitch along the marked pocket lines, leaving the pocket openings unstitched.
Step 6: Construct the Waistband
Fold over the top edge of the pants to create a casing for the elastic waistband. The width of the casing will depend on the width of your elastic. Make sure to leave enough space to comfortably insert the elastic. Sew along the folded edge, leaving a small opening to insert the elastic.
Step 7: Insert Elastic
Attach a safety pin to one end of the elastic and guide it through the waistband casing. Once the elastic is all the way through, overlap the ends, ensuring a snug but comfortable fit, and stitch them together securely. Close the opening in the waistband casing.
Step 8: Hem the Pants
Fold up the bottom edge of each pant leg to your desired length and pin it in place. Try on the pants to ensure you're happy with the length before stitching. Once you're satisfied, sew a straight stitch along the folded edge to hem the pants.
Step 9: Embellish (Optional)
To add a touch of Mad Hatter flair to your pants, consider embellishing them with buttons, patches, or other decorative elements. Get creative and let your imagination run wild to truly capture the spirit of the Mad Hatter.
With these sewing techniques, you'll be able to create your very own pair of Mad Hatter pants. Remember to customize them according to your preferences and make them uniquely yours. So grab your sewing machine, your favorite fabric, and get ready to embark on a whimsical sewing adventure!
Is It Fashionable to Wear White Pants in May? Exploring the Fashion Rules
You may want to see also
Frequently asked questions
To make Mad Hatter pants, start by finding a pair of high-waisted pants in a bold pattern or color. If you can't find high-waisted pants, you can make alterations to regular pants by raising the waistline. Then, add embellishments such as buttons, ribbons, or bows to create a whimsical look. You can also consider adding patches, lace, or ruffles for added detail.
To make Mad Hatter pants, you will need a pair of high-waisted pants, preferably in a bold pattern or color. You will also need embellishments such as buttons, ribbons, bows, patches, lace, or ruffles to create the fantastical Mad Hatter look. Additionally, you will need a sewing kit with needles, thread, and scissors to complete the sewing and alterations.
While basic sewing skills will be helpful, they are not necessarily required to make Mad Hatter pants. If you are a beginner, you can opt for no-sew options by using fabric glue or iron-on patches to attach the embellishments. However, if you want a more secure and professional finish, having some sewing skills will be beneficial. There are also plenty of beginner-friendly tutorials and resources available online to guide you through the process of making Mad Hatter pants.