
Have you ever found a perfect pair of pants, only to realize they don't come in your size? Well, fear not, because there is a way to transform those medium pants into a smaller size! In this guide, we will explore various techniques and tricks to help you make your medium pants fit perfectly - no alterations required. So get ready to learn how to turn those medium pants into small pants and get ready to rock your new, customized fit!
| Characteristics | Values |
|---|---|
| Material | Cotton, polyester |
| Size | Medium |
| Waistband | Elastic |
| Length | Regular |
| Closure | Button and zip fly |
| Pockets | Front and back pockets |
| Style | Straight cut |
| Color | Various |
| Fit | Relaxed |
| Care Instructions | Machine wash cold, tumble dry low |
| Alterations Needed | Take in waist, shorten length |
| Tailoring Techniques | Seam ripping, resizing |
| Tools Required | Sewing machine, thread, scissors, pins |
| Difficulty Level | Intermediate |
| Time Required | 1-2 hours |
| Cost | Minimal - price of alterations materials |
| Professional Help Required | Optional, but recommended for beginners or complex alterations |
| Potential Risks | Damage to the pants, improper fitting |
| Final Result | Small pants that fit properly |
What You'll Learn
![]()
Gathering the necessary tools and materials
Are you tired of your pants falling off because they are too big? Don't worry, you don't have to spend a fortune buying new ones. With just a few simple tools and materials, you can easily transform your medium-sized pants into the perfect small size. Here's a step-by-step guide on how to make medium pants into small pants.
First, gather all the necessary tools and materials. You will need a sewing machine or needle and thread, scissors, a measuring tape, pins, and a fabric marker. If you don't already have these items, you can easily find them at your local craft or sewing store.
Next, measure yourself to determine your desired pant size. Take the measuring tape and measure your waist, hips, and leg length. Write down these measurements as they will be crucial in altering your pants to fit you perfectly.
Now, it's time to start the alteration process. Put on your medium-sized pants and use the fabric marker to mark the areas that need to be adjusted. This could include the waistband, side seams, and inseam. Make sure to mark both sides of the pants evenly for a symmetrical fit.
Using a pair of scissors, carefully cut along the marked lines. Be sure to leave a little bit of extra fabric for seam allowance. If you're using a sewing machine, set it on a straight stitch and sew along the new cut lines. If you're hand sewing, use a strong and secure stitch to ensure the alterations hold up.
Once you've made the necessary adjustments, try on the pants to ensure they fit properly. If they are still too big, you can continue to make additional alterations. If they are too small, you may need to let out the seams slightly or consider another method of alteration.
If you are satisfied with the fit, trim any excess fabric and finish the edges with a zigzag stitch or an overlock stitch to prevent fraying. This will give your altered pants a clean and professional look.
Lastly, give your newly altered pants a final press with an iron to remove any wrinkles and creases. This will give them a polished finish and make them look like they were professionally tailored to your exact measurements.
By gathering the necessary tools and materials and following these step-by-step instructions, you can easily transform your medium pants into small pants that fit you perfectly. Instead of spending money on new pants, you can repurpose the ones you already have and save yourself some cash. Get ready to show off your new, perfectly fitted pants to the world!
Discover the Perfect Store to Find Stylish Purple Pants for Any Occasion
You may want to see also
![]()
Taking accurate measurements for the desired size adjustment

When it comes to altering the size of your pants, it's crucial to take accurate measurements to ensure a perfect fit. Whether you want to transform medium pants into small pants or make any other size adjustment, following the proper measurement techniques is essential. Here's a step-by-step guide to help you take accurate measurements for your desired size adjustment:
Step 1: Gather the necessary tools
To take accurate measurements, you'll need a measuring tape, a pen or marker, and a piece of paper to record the measurements. It's crucial to use a flexible tape measure that can wrap around your body easily.
Step 2: Measure the waist
Start by measuring your waist to determine the required adjustment. Wrap the measuring tape around your natural waistline, which is located above your belly button and below your ribcage. Keep the tape parallel to the ground and snug against your skin, but not too tight. Note down this measurement.
Step 3: Measure the hip
Next, measure your hip circumference. Wrap the measuring tape around the fullest part of your hips, typically around the broadest point of your buttocks. Make sure the tape is parallel to the ground and not twisted. Record this measurement as well.
Step 4: Record the desired adjustments
Once you have taken the waist and hip measurements, it's time to determine the desired adjustments for your pants. Take note of how much smaller you want the waist and hip measurements to be. Consider the fit you want – whether it's a slim fit or a regular fit – and make the necessary calculations to determine the adjustments for each measurement.
Step 5: Measure the inseam
To ensure the desired length and fit of your pants, measure the inseam. Start from the crotch area and measure down to where you want the pants to end. This measurement is crucial, as it will determine how long or short your pants will be after the alteration.
Step 6: Take additional measurements
Depending on the style and fit of your pants, you may need to take additional measurements. For example, you may want to measure the thigh circumference, knee circumference, or the width of the leg opening. These measurements will help you achieve the desired fit throughout the entire leg.
Step 7: Double-check your measurements
After taking all the necessary measurements, double-check them to ensure their accuracy. It's better to spend a little extra time now to avoid any mistakes later on.
Step 8: Mark the adjustments on the pants
Now that you have determined the desired adjustments, it's time to mark them on the pants. Use a pen or marker to indicate where you need to cut or sew to achieve the desired size. Take your time and be precise while marking the adjustments to ensure the best results.
By following these steps and taking accurate measurements, you'll be well on your way to transforming medium pants into small pants. Remember to take your time, be precise, and make sure to double-check your measurements before making any alterations. With a little patience and attention to detail, you can achieve the perfect fit for your pants.
The Latest Trend: Boys' Red Jogger Pants for a Stylish and Comfortable Look
You may want to see also
![]()
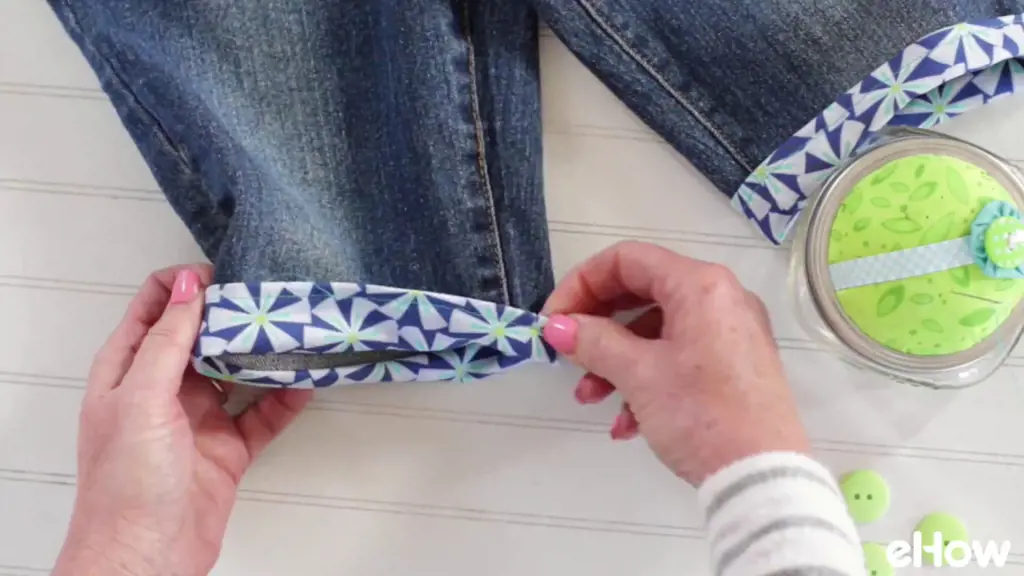
Making precise cuts and adjustments to the pants
If you have a pair of medium pants that you want to turn into small pants, you can do so by making precise cuts and adjustments. This process requires some basic sewing skills, but with careful planning and execution, you can achieve a great fit. Here's a step-by-step guide on how to make medium pants into small pants.
- Gather the necessary supplies: You'll need a pair of medium pants, sewing scissors, a sewing machine or needle and thread, pins, measuring tape, and a sewing marker.
- Start by trying on the medium pants and identifying where you want the smaller waistline and leg length to be. Use the measuring tape to measure the desired waist and inseam length, and make a note of these measurements.
- Lay the pants on a flat surface, and using the measuring tape and sewing marker, mark the new waistline and inseam measurements on the pants. Be sure to leave some allowance for seams and adjustments.
- Starting with the waistline, carefully cut along the marked line, removing the excess fabric. If there are belt loops, cut them off as well, as you'll need to reposition them later.
- Try the pants on again to check the fit. If the waistline is still too loose, make additional small adjustments by taking in the sides of the pants. Use pins to hold the fabric in place, and try them on again to ensure a snug fit.
- Once you're satisfied with the waistline, it's time to adjust the length. Turn the pants inside out and fold up the excess fabric along the inseam line. Pin the fold in place and try the pants on again to check the length. Make any necessary adjustments by either folding more fabric or trimming off excess fabric.
- After achieving the desired length, you can either hand stitch or use a sewing machine to sew along the pinned fold line. Remember to backstitch at the beginning and end of the seam to secure it.
- If you had to remove belt loops, now is the time to reattach them. Measure the new waistline and mark where the belt loops should be placed. Sew them back on securely, ensuring they are evenly spaced.
- To finish off the alterations, trim any loose threads and give the pants a final press with an iron.
And there you have it! By making precise cuts and adjustments to your medium pants, you can easily transform them into a perfectly fitting pair of small pants. Remember to take your time, measure accurately, and make small adjustments as needed. Before you know it, you'll have a customized pair of pants that you'll love to wear.
Can a Pear-Shaped Body Pull off Wide-Leg Pants? Tips and Tricks for Flattering Your Figure
You may want to see also
![]()
Sewing and finishing the altered pants for a perfect fit

Once you have determined how to make your medium-sized pants into small pants, the next step is to sew and finish the alterations. This process may seem daunting, especially if you have never sewn before, but with a little patience and practice, you can achieve a perfect fit for your pants. Here is a step-by-step guide on sewing and finishing the altered pants:
- Prepare your materials: Before you begin sewing, gather all the necessary materials. This includes a sewing machine, sewing thread that matches the color of your pants, a seam ripper, pins, scissors, and a tape measure. Having all these supplies on hand will make the process much smoother.
- Try on the pants: Put on the altered pants and assess the fit. Pay attention to any areas that still need adjustments, such as the waist, hips, or legs. This will help you determine which areas you need to focus on during the sewing process.
- Mark the alterations: Use a fabric marker or tailor's chalk to mark any areas that need to be taken in or hemmed. For example, if the waistband is too big, mark the excess fabric with a straight line. If the pant legs are too long, mark the desired length with a horizontal line.
- Sew the alterations: Start by removing any excess fabric using a seam ripper. Be careful not to cut into the pants or any important seams. Once you have removed the excess fabric, pin the marked areas together to secure them in place. This will prevent the fabric from shifting while you sew. Use a straight stitch on your sewing machine to sew along the marked lines, removing the pins as you go.
- Finish the seams: After sewing the alterations, it is important to finish the seams to prevent fraying. There are several methods you can use to finish the seams, such as zigzag stitching, serging, or using a French seam. Choose the method that works best for you and follow the appropriate steps to finish the seams.
- Hem the pants: If the pants are too long, you will need to hem them to the desired length. Start by trying on the pants again and folding the fabric up to the desired length. Use pins to hold the fold in place. Then, remove the pants and measure the folded fabric to ensure it is even on both legs. Sew a straight stitch along the folded edge to secure the hem in place. Trim any excess fabric if necessary.
- Press the pants: Once you have finished sewing and hemming the altered pants, it is important to press them to give them a polished look. Use an iron on the appropriate setting for your fabric and press the seams and hems. This will help the alterations lay flat and give the pants a professional finish.
By following these steps and taking your time, you can successfully sew and finish the altered pants for a perfect fit. Remember to double-check your measurements and make any necessary adjustments before sewing, and don't be afraid to seek help or advice if needed. With practice, you will become more confident in altering and sewing your own clothes.
Exploring the Versatility and Functionality of the Stretch Zion Pant
You may want to see also
Frequently asked questions
To make medium pants into small pants, you can start by turning the pants inside out and pinning the excess fabric to create a new seam line. Then, use a sewing machine or needle and thread to sew along the new seam line, removing the excess fabric. Finally, cut off any excess fabric and finish the edges with a serger or zigzag stitch.
Yes, using a belt can be a temporary solution to making medium pants smaller. Simply tighten the belt around your waist to cinch in the extra fabric and create a more fitted look. However, keep in mind that this method may not be as secure or comfortable as actually altering the pants to fit your size.
Yes, there are a few no-sew methods you can try to make medium pants smaller. One option is to use fabric adhesive or hem tape to create a new seam line and secure the excess fabric. Additionally, you can try using a fabric cinch or elastic bands to gather in the fabric and create a smaller fit.
While it is possible to shrink pants to some extent by washing them in hot water or using a dryer on a high heat setting, it is not a reliable or recommended method for making medium pants smaller. Shrinking the fabric may cause it to become misshapen, and it is unlikely to result in a significant size reduction.
If you want a more precise and long-lasting result, it is typically better to have the pants professionally altered. A skilled tailor or seamstress can take your measurements and make alterations that will result in a better fit. They can also provide advice on the best methods to alter the pants based on the fabric and design.


