Are you tired of struggling with a tight waistband on your pants? Do you wish there was an easy way to add a little extra room without having to buy a whole new pair? Well, look no further! In this guide, we will show you how to make a pant waist extender right in the comfort of your own home. With just a few simple materials and a little bit of time, you'll be able to transform your tight-fitting pants into comfortable and wearable garments. So let's get started on this DIY fashion project that will revolutionize your wardrobe!
| Characteristics | Values |
|---|---|
| Material | Elastic band, button |
| Length | Varies, depending on the desired extension |
| Width | Varies, depending on the desired fit |
| Buttonhole Size | Matches the size of the pants' button |
| Sewing Needle | Use a needle suitable for sewing the fabric and elastic band |
| Thread | Match the color of the thread to the pants |
| Sewing Machine | Optional. Can be sewn by hand if no machine is available |
| Steps | 1. Measure the desired extension needed for the waistband. 2. Cut the elastic band to the desired length. 3. Sew the edges of the elastic band together to form a loop. 4. Attach a button to one end of the elastic band. 5. Make a buttonhole on the other end of the elastic band, matching the size of the pants' button. 6. Sew the buttonhole securely. |
| Usage | Attach the extender to the pants' button and buttonhole. It will provide additional room and comfort in the waist area. |
| Benefits | Allows for expanding the waistband of pants that may have become tight or uncomfortable due to weight gain, bloating, or temporary changes in body size. Provides a quick and cost-effective solution without the need to buy new pants. Can be easily removed or added as needed. |
| Alternatives | Using a rubber band as a temporary waist extender. Making a buttonhole and attaching a small piece of fabric with a button for a DIY extender. Purchasing a pre-made pant waist extender. |
What You'll Learn
![]()
Materials needed for DIY pant waist extender

If you find yourself struggling to button up your pants due to a too-tight waistband, a pant waist extender can be a lifesaver. Rather than going out and buying a new pair of pants, you can create your own pant waist extender at home. In this blog post, we will discuss the materials you will need for this DIY project.
- Elastic: The main component of a pant waist extender is elastic. Look for a wide elastic band that is sturdy and stretchy. It should be long enough to comfortably wrap around your waist while still providing a snug fit.
- Fabric: You will need a small piece of fabric to cover the elastic and give your waist extender a polished look. Choose a fabric that matches the color and texture of your pants. This fabric should be soft and comfortable against your skin.
- Sewing machine or needle and thread: To create a durable pant waist extender, you will need to sew the elastic and fabric together. If you have a sewing machine, it will make the process faster and more efficient. However, you can also sew the extender by hand using a needle and thread.
- Scissors: A good pair of scissors is essential for cutting the elastic and fabric to the desired size. Make sure your scissors are sharp enough to easily cut through the materials.
- Sewing pins: Sewing pins will help you hold the fabric in place while sewing. They will prevent the fabric from shifting or bunching up, resulting in a neater finish.
- Measuring tape: Before cutting your elastic and fabric, use a measuring tape to determine the exact length you need for your pant waist extender. Measure your waist and add a few inches to accommodate for the stretch of the elastic.
Once you have gathered these materials, you will be ready to create your own pant waist extender. Stay tuned for our next blog post, where we will provide step-by-step instructions on how to sew the elastic and fabric together to make a functional and comfortable pant waist extender.
Upgrade Your Style with Women's Black Checkered Pants
You may want to see also
![]()
Step-by-step guide to creating a pant waist extender

If your pants are feeling a bit too tight around the waist, you don't have to rush to the store to buy a new pair. Instead, you can create a waist extender at home to give yourself some extra room and make your pants more comfortable to wear. In this step-by-step guide, we'll show you how to make a pant waist extender using simple materials.
Here's what you'll need:
- A button (preferably a large one)
- Some fabric scraps (about 3 inches wide and 6 inches long)
- A needle and thread or a sewing machine
- A pair of scissors
Step 1: Cut Fabric Strips
Start by cutting two fabric strips that are about 3 inches wide and 6 inches long. You can use any fabric you have on hand, but it's best to choose a fabric that has a bit of stretch to it, like cotton or knit.
Step 2: Fold and Sew the Strips
Take one of the fabric strips and fold it in half lengthwise, with the right sides facing each other. Then, sew along the long edge of the strip, about 1/4 inch from the edge. Repeat this step with the second fabric strip.
Step 3: Turn the Strips Inside Out
Carefully turn both fabric strips inside out, so that the right sides are facing out. You can use a pencil or a knitting needle to help push out the corners and make the strips nice and straight.
Step 4: Attach the Button
Take one of the fabric strips and position it on the inside of your pants, at the point where you want to add the waist extender. Make sure the raw edges of the strip are aligned with the edge of the waistband. Then, sew the strip in place, stitching it directly onto the waistband.
Next, take your button and sew it onto the other end of the fabric strip, making sure it's securely attached. The button should be on the outside of your pants, facing away from your body.
Step 5: Attach the Second Strip
On the opposite side of the waistband, attach the second fabric strip in the same way. Line it up with the first strip, making sure the raw edges are aligned. Sew the strip onto the waistband, and attach a button to the other end.
Step 6: Test and Adjust
Once you've attached both fabric strips and buttons, try on your pants to make sure the waist extender is working properly. Fasten the buttons together to extend the waistband and provide a bit of extra room. If necessary, you can make adjustments by moving the buttons or adding more fabric strips.
That's it! You've successfully created a pant waist extender at home. Now you can enjoy wearing your pants comfortably, without feeling constricted around the waist.
Creating Stylish Newsboy Pants: A Step-by-Step Guide
You may want to see also
![]()
Tips for adjusting the pant waist extender to the perfect fit
Whether you’ve recently gained weight or are experiencing bloating, adjusting the pant waist extender can be a lifesaver in achieving the perfect fit. Rather than purchasing a new pair of pants, you can easily make a pant waist extender at home and customize it to your needs. Here are some useful tips to help you adjust the pant waist extender to achieve the perfect fit.
- Measure and cut the elastic: Start by measuring the length of elastic needed to extend your pant waistline. It’s important to select an elastic that is strong enough to hold the pants securely but flexible enough to provide a comfortable fit. Elastic with a width of around 1 inch (2.5 cm) should be sufficient for most adjustments. Once you’ve determined the length needed, cut the elastic accordingly.
- Secure the elastic: Take one end of the elastic and fold about 0.5 inches (1.3 cm) back onto itself. Use a needle and thread or a sewing machine to sew a straight stitch across the folded end. This ensures that the elastic won’t fray or unravel over time. Repeat this process on the other end of the elastic as well.
- Attach the hook and loop fasteners: On one end of the elastic, attach the hook side of a hook and loop fastener, such as Velcro. Sew or glue it securely in place, making sure it is centered on the elastic. On the other end of the elastic, attach the loop side of the hook and loop fastener in the same manner.
- Test the fit: Put on the pants and fasten the pant waist extender around the button on the waistband. Adjust the tightness to your desired fit by connecting the hook and loop fasteners at different points along the elastic. Test the comfort and security of the pant waist extender by moving and sitting down. If necessary, make further adjustments to achieve the perfect fit.
- Trim the excess elastic: Once you’re satisfied with the fit, trim any excess elastic from both ends, leaving enough length to attach the hook and loop fasteners securely. Be careful not to cut the elastic too short, as it may become difficult to fasten the pant waist extender.
- Reinforce the fasteners: To ensure the hook and loop fasteners stay securely attached, reinforce them by sewing a few additional stitches around the edges. This will prevent them from coming loose or detaching when you move or bend.
- Customize and accessorize: If desired, you can personalize your pant waist extender by adding decorative elements or matching fabric to cover the elastic. This can help to hide the extender and make it blend seamlessly with your pants.
With these tips in mind, you can easily adjust the pant waist extender to achieve the perfect fit. Remember to measure carefully, test the fit, and make any necessary adjustments before finalizing the extender. By doing so, you can ensure that your pants feel comfortable and look great, regardless of any temporary changes in your waistline.
Discover Style and Comfort: Where to Find Crinkled Material Capri Pants for Your Wardrobe
You may want to see also
![]()
Alternative options for pant waist extenders

If you find that your pants are feeling a bit tight around the waist, there's no need to worry. There are alternative options for pant waist extenders that you can easily make at home. Whether you've gained a few pounds or you simply need a little extra room, these DIY extenders can help provide the perfect fit. Here are a few ideas to get you started:
Elastic Band Extender:
One of the simplest and most effective ways to extend the waistline of your pants is by using an elastic band. Measure an elastic band that is about the same length as the waistband of your pants when it’s fully stretched. Sew the ends of the elastic band to the inside of your pants waistband, evenly distributing them around the waist. This will give your pants some extra stretch and allow for a more comfortable fit.
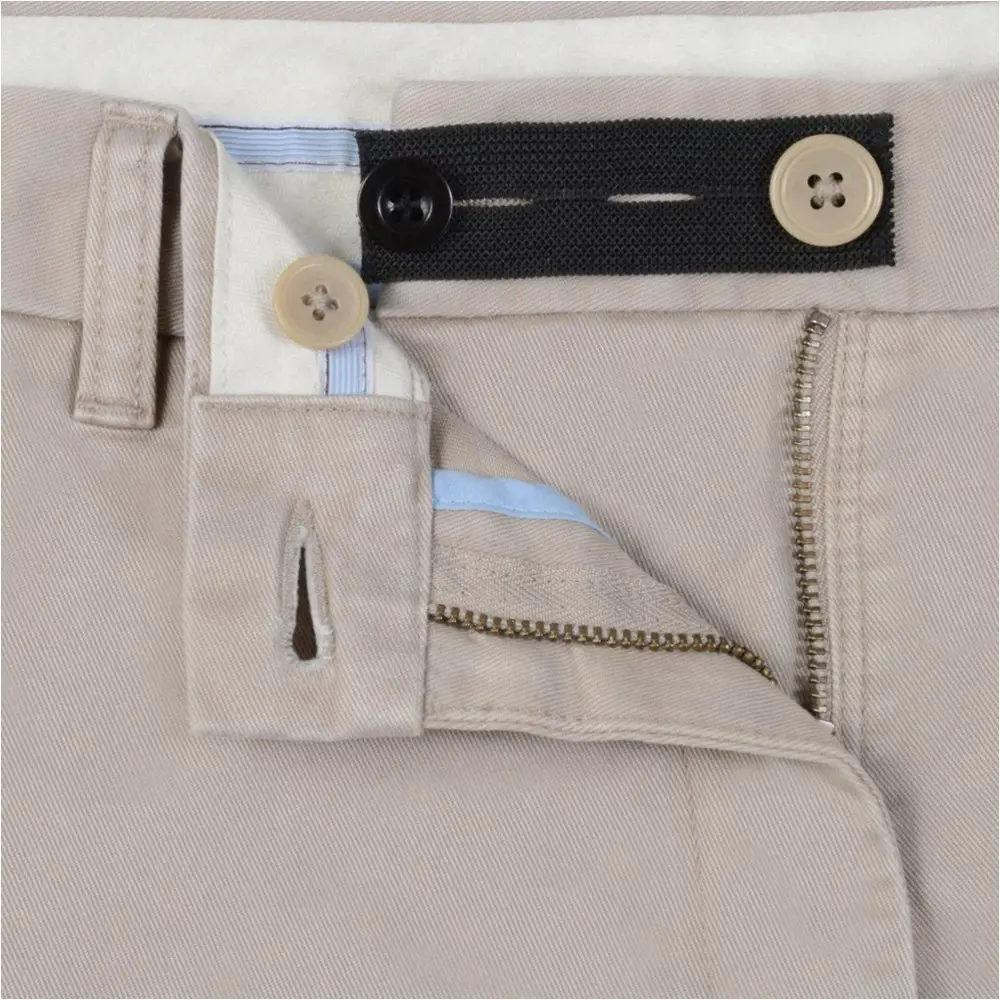
Button Extender:
If you have a small gap at the waistband of your pants, a button extender can be a quick fix. Start by sewing a button on the inside of one side of your pants waistband, near the existing button. On the other side, sew a small loop or strip of fabric that will act as a buttonhole. You can then attach the extender by looping it around the button, providing a little extra room for your waist.
Hook and Eye Extender:
For pants that have a hook and eye closure, you can easily create an extender using a small piece of fabric and a hook and eye set. Cut a strip of fabric that is about 1-2 inches wide and long enough to extend across the waistband gap. Sew one half of the hook and eye set to each end of the fabric strip. Attach the hook to one side of the pants waistband and the eye to the other side, creating a secure closure that adds extra wiggle room.
Safety Pin Extender:
In a pinch, you can use a safety pin as a temporary waist extender. Simply fasten the safety pin through the hole of the button and loop it around the buttonhole, creating a larger waist circumference. Keep in mind that this method may not be as secure as the others, so it's best to use it as a temporary solution.
Using these alternative options for pant waist extenders, you can give your pants a little extra stretch and ensure a comfortable and proper fit. Try out these DIY extenders at home, and say goodbye to uncomfortable waistlines in your favorite pants.
The Ultimate Guide to Jogger Pant Sets: Comfort Meets Style
You may want to see also
Frequently asked questions
To make a pant waist extender at home, you can use a hair elastic or a rubber band. Simply loop the elastic or band through the buttonhole of your pants and then attach it to the button on your pants. This will provide some extra room in the waist area.
If you don't have a hair elastic or rubber band, you can also use a safety pin to create a waist extender. Just thread the safety pin through the buttonhole of your pants and then clasp it around the button. This will help to expand the waist area of your pants.
Yes, you can easily remove the waist extender once you no longer need it. Simply unhook the hair elastic, rubber band, or safety pin from the button and buttonhole of your pants. This will revert the waist back to its original size.