Are you tired of your pristine pants looking, well, too clean? If you're looking to add a touch of ruggedness and intrigue to your outfits, then this guide is for you. We've got the secret formula to make your pants appear authentically dirty, without actually getting down and dirty. Whether you're aiming for a distressed look or want to channel that effortlessly cool, lived-in vibe, we've got the tips and tricks that will have everyone fooled into thinking you've just returned from an epic adventure. So, let's delve into the art of making your pants look delightfully dirty, without a speck of actual dirt in sight.
| Characteristics | Values |
|---|---|
| Color | Brown |
| Texture | Rough |
| Fading | Distressed |
| Stains | Mud, grease |
| Rips | Torn |
| Dust | Accumulated |
| Fraying | Loose threads |
| Wrinkles | Creased |
| Bleach marks | Spots and discolorations |
| Paint spills | Splatters |
| Distressed patches | Faded areas |
What You'll Learn
![]()
Choosing the Right Fabric for a Dirty Look

If you want to achieve a stylishly worn-out appearance for your pants, selecting the right fabric is crucial. The fabric you choose can greatly impact the way your pants look and ultimately determine the success of your attempt to make them appear dirty. Whether you're going for a grunge-inspired look or trying to achieve an aged vintage aesthetic, here are some fabrics to consider for creating that perfect dirty look.
Denim:
Denim is a classic choice when it comes to creating a dirty look for pants. Its durable and rugged nature makes it perfect for achieving a worn-in appearance. When choosing a denim fabric, opt for a medium to heavyweight denim with a slightly worn-out texture. Look for fabrics that already have a distressed finish or opt for raw denim and distress it yourself. Use sandpaper or a cheese grater to create abrasions and scratches, focusing on areas like the knees, thighs, and the back pockets where natural wear and tear would occur.
Corduroy:
Corduroy is another fabric that works great for achieving a dirty look. Choose a wide-wale or medium-wale corduroy as it tends to look more worn and distressed compared to fine-wale corduroy. The texture of the fabric itself adds to the overall grungy appearance. To make your corduroy pants look dirty, consider using techniques like acid washing or bleaching to create faded patches and discoloration. For a bit of an edgier touch, you can also add some strategic cuts and tears using a pair of scissors or a utility knife.
Khaki:
For a more casual and relaxed worn-out look, khaki pants are a great option. Look for cotton khaki fabric that has a slightly worn and faded appearance. Consider opting for a lightweight or twill khaki fabric as they tend to wrinkle and distress easily, giving them that naturally dirty vibe. To enhance the worn look, try using techniques like tea staining or dying with coffee to create subtle discoloration and stains. You can also try distressing the fabric by using a wire brush or a pumice stone to create small abrasions and imperfections.
Chino:
Similar to khaki, chino fabric is ideal for achieving a dirty look with a more refined touch. Choose a cotton chino fabric that has a slightly worn and aged appearance. Chino fabric often comes in various weights, so select one that is lightweight or medium-weight to make it easier to distress. Consider using techniques like rubbing sandpaper on areas prone to wear, like the thighs and the knees, to create a distressed and faded effect. You can also try hand-dying with a darker color to create a mottled or uneven tone.
Remember, regardless of the fabric you choose, it's essential to approach distressing with caution and moderation. Start with small changes and gradually build up to achieve your desired dirty look. Don't forget to consider the fit and style of your pants when distressing, as these factors can also contribute to the overall appearance. With the right fabric selection and careful distressing techniques, you can create pants that look naturally dirty and effortlessly stylish.
The Ultimate Guide to Slimming Down Your Pants
You may want to see also
![]()
Distressing Techniques for Pants to Achieve a Dirty Appearance

If you're looking to achieve a grungy or vintage look, distressing your pants to make them look dirty is a great way to achieve that worn-in, rugged aesthetic. Whether you're going for a casual, rock-inspired style or simply want your pants to look more lived-in, here are some techniques you can try to achieve a dirty appearance.
- Start with the right pair of pants: To achieve a convincingly dirty look, it's important to choose a pair of pants made from durable fabrics like denim or canvas. These materials are more forgiving and can withstand aggressive distressing techniques without easily falling apart.
- Gather your supplies: Before you start distressing, gather all the supplies you'll need such as sandpaper, a wire brush, bleach, fabric dye, dirt or mud, and a spray bottle filled with water. Depending on the effect you want to achieve, you may not need all of these supplies, but having them on hand allows for greater flexibility in the distressing process.
- Rub sandpaper on high friction areas: Start by using sandpaper to gently abrade the high friction areas of your pants. Focus on areas like the knees, thighs, pockets, and hems. The goal is to create subtle signs of wear and tear, without going overboard. Use a light touch to avoid creating large holes or completely ruining the fabric.
- Use a wire brush for more pronounced distressing: For a more pronounced dirty appearance, you can use a wire brush to create rougher textures on the fabric. Brush the surface of the pants vigorously in areas where you want the dirt effect to be more visible, such as the front of the thighs or the back pockets.
- Experiment with bleach and fabric dye: If you want to add discoloration to your pants, you can experiment with bleach and fabric dye. For a faded, sun-bleached appearance, apply small amounts of bleach to specific areas using a spray bottle, then let the pants dry naturally in the sun. To add a dirty, aged look, you can apply fabric dye in earthy tones like brown or olive, focusing on the areas where distressing has been done.
- Use dirt or mud for a natural dirty effect: To achieve a realistic dirty appearance, consider using actual dirt or mud. Apply a small amount of dirt or mud to a sponge or cloth and gently rub it on the pants. Be mindful not to overdo it, as the goal is to create a subtle dirt effect rather than a complete mess.
- Be creative with other distressing techniques: If you want to go the extra mile, you can experiment with other distressing techniques. For example, you can use a box cutter or razor blade to create small cuts or slits in your pants. This can add to the worn-in, dirty look you're trying to achieve.
Remember, distressing your pants to make them look dirty is a matter of personal preference and style. Feel free to experiment with different techniques and find what works best for you. However, it's important to start gradually and build up distressing as you go, as it can be easy to go overboard and ruin your pants if you're not careful. So take your time, be patient, and have fun creating your desired dirty appearance.
Can I Pair a Nicer Parka with Ski Pants? Exploring Fashion Versatility on the Slopes
You may want to see also
![]()
Adding Mud or Dirt Stains to Pants for an Authentic Look

If you're looking to achieve an authentic and rugged look for your pants, adding mud or dirt stains can instantly give them a worn and well-loved appearance. Whether you're dressing up for a costume party, going for a grunge or Bohemian style, or just want to revamp your old pants, creating dirt or mud stains can be a fun and creative way to achieve the look you desire. In this blog post, we'll guide you through the process of adding mud or dirt stains to your pants for an authentic and worn-out vibe.
Before you begin, here are some things you'll need:
- Pants: Choose a pair of pants that you're willing to experiment on. It's best to use old pants or ones you no longer wear regularly.
- Mud or dirt: Look for a spot in your yard or garden where you can access some mud or dirt. If you don't have easy access to mud, you can also use store-bought dirt or even coffee grounds as a substitute.
- A brush or sponge: You'll need a brush or a sponge to apply the mud or dirt stains onto your pants.
- Water: Keep a bucket or a hose nearby to wet the stains and achieve the desired effect.
Now let's get started with the step-by-step process:
- Prepare your pants: Start by cleaning your pants to remove any dust or dirt that might be on them. You can do this by simply washing them in the machine or hand-washing them. Make sure they are completely dry before proceeding to the next step.
- Find the right mud or dirt: If you have access to mud in your yard, search for a spot where the mud is wet and has a thick consistency. Otherwise, if you're using store-bought dirt or coffee grounds, make sure they are damp enough to stick to your pants.
- Apply the mud or dirt: Dip your brush or sponge into the mud or dirt and begin applying it to the desired areas of your pants. Start with smaller patches and gradually increase the size and density of the stains according to your preference. Focus on areas that would naturally accumulate dirt or mud, such as the knees, thighs, and pockets. Be creative and experiment with different patterns and intensities to achieve a more authentic look.
- Blend and spread the stains: Once you've applied the mud or dirt stains, use your brush or sponge to blend and spread them. This will give a more natural and faded appearance. You can gradually increase the intensity by adding additional layers or leave it as is for a more subtle effect.
- Wet the stains: To enhance the realism of the stains, wet them with water. You can either spray water directly onto the stained areas using a hose or sprinkle water from a bucket. This will help the mud or dirt settle into the fabric and create a natural drying pattern.
- Let it dry: After wetting the stains, allow your pants to dry naturally. Hang them up or lay them on a flat surface in the sun or a well-ventilated area. Avoid using a dryer as it may cause the stains to fade or come off.
- Repeat if necessary: If you're not satisfied with the intensity or appearance of the stains, you can repeat the process by adding more mud or dirt and blending it in. Remember to wet the stains again before allowing them to dry.
- Optional: Seal the stains (if desired): If you want the stains to be more permanent and durable, you can use a fabric sealant spray. This will help preserve the appearance of the stains even after washing your pants in the future.
And there you have it – your pants now have a realistic and rugged look with mud or dirt stains! Remember, this technique is meant to be fun and experimental, so feel free to adjust the process according to your personal preferences. Whether you're going for an edgy style or want to create a costume, adding mud or dirt stains to your pants is a great way to achieve an authentic and worn-out look. So go ahead, get creative, and embrace the adventurous spirit!
The Accuracy of Judging a Man's Style by His Pants: Insights into Women's Fashion Perception
You may want to see also
![]()
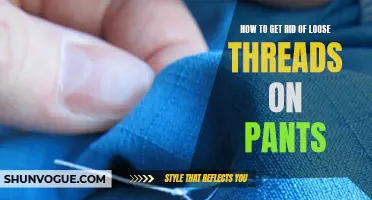
Enhancing the Dirty Look with Rips, Frays, and Patching

When it comes to fashion, a distressed and dirty look can often be on-trend. If you want to enhance the dirty look of your pants, you can elevate it by adding rips, frays, and patchwork to create a unique and edgy style. Whether you are looking to create a grunge aesthetic or simply want to add some character to your outfit, here are some tips on how to achieve the desired effect.
### Materials you'll need:
- Pair of pants (preferably jeans or denim)
- Scissors or razor
- Sandpaper or grater
- Needle and thread
- Fabric patches (optional)
- Safety pins (optional)
### Step 1: Choosing the Right Pants
Start by selecting a pair of pants that you want to distress. Jeans or denim pants tend to work best for this purpose, but you can experiment with other fabric types as well.
### Step 2: Creating Rips and Tears
Decide where you want to create rips and tears on your pants. Common areas include the knees, thighs, and cuffs. Take a pair of scissors or a razor and carefully make small incisions at those spots. Remember that less is more when it comes to distressing, so start with a few small rips and add more later if needed.
### Step 3: Fraying the Edges
To give your pants a frayed look, use a pair of scissors or a razor to carefully scrape along the edges of the rips you created. This will loosen the threads and create a frayed effect. You can also use sandpaper or a grater to rough up the fabric and achieve a more worn-out appearance.
### Step 4: Patching Up
If you want to add some patchwork to your pants, now is the time to do it. Find fabric patches that complement the color and style of your pants. You can either sew them onto the fabric using a needle and thread or use safety pins for a more temporary solution. Patching can be done over the rips or in other areas of your pants to add an extra layer of texture and visual interest.
### Step 5: Distressing Further (Optional)
If you want to take the distressing to another level, you can consider using bleach or fabric dye to create a faded or dirty effect. Be cautious when using bleach as it can damage the fabric if not used correctly. Similarly, fabric dye should be used following the manufacturer's instructions. Test these techniques on a small, inconspicuous area first before applying them to the entire garment.
### Step 6: Washing and Maintenance
Once you have achieved the desired look, be sure to wash your pants separately to prevent any dye or bleach from transferring onto other garments. Avoid using fabric softener as it can diminish the distressed effect. To maintain the appearance of your distressed pants, always follow the care instructions on the label and take extra care when washing and drying them.
With these simple steps, you can transform a regular pair of pants into a stylish and edgy garment with a dirty, distressed look. Remember to be creative and experiment with different techniques to achieve the desired effect. Whether you want to achieve a grunge chic or an effortlessly cool style, enhancing the dirty look with rips, frays, and patchwork is a great way to add a unique touch to your wardrobe.
Can a 40 Waist Pants Be Cut Down to 34? The Myth Debunked
You may want to see also
Frequently asked questions
There are a few ways you can achieve the "dirty" look without actually getting your pants dirty. You can use fabric paint or fabric dye to create stains or discoloration on specific areas of your pants. Additionally, you can use sandpaper or a cheese grater to create a worn or distressed look in certain areas.
Yes, there are alternative methods to achieve a dirty look on your pants without using paint or dye. You can try using coffee grounds or tea leaves to create natural stains or discoloration. You can also try rubbing dirt or mud onto your pants and then lightly brushing it off to leave a subtle dirty appearance.
To make your pants look convincingly dirty for a costume or theater production, you can use a combination of methods. Start by using fabric paint or dye to create realistic stains or discoloration on specific areas. Then, use sandpaper or a cheese grater to add worn or distressed details. Finally, consider using coffee grounds, tea leaves, or dirt to create additional natural-looking dirtiness on your pants. Remember to blend the different techniques together for a more realistic effect.