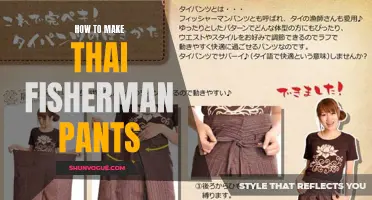
Are you tired of spending a fortune on trendy ripped jeans? Why not try making your own unique and fashionable pair of scratch pants? Not only will you save money, but you'll also have full creative control over the design. In this guide, we'll explore the step-by-step process of transforming an old pair of jeans into a stylish, distressed masterpiece. Get ready to unleash your inner fashion designer and turn heads with your one-of-a-kind scratch pants creation.
| Characteristics | Values |
|---|---|
| Material | Cloth |
| Thickness | Medium |
| Elasticity | Stretchy |
| Waistband | Elastic |
| Length | Full length |
| Closure | Drawstring |
| Pockets | Yes |
| Fit | Relaxed |
| Style | Casual |
| Care | Machine washable |
| Color options | Various |
What You'll Learn
![]()
Gathering Materials and Tools

Making your own scratch pants can be a fun and rewarding project. Whether you need them for gardening, woodworking, or any other task that requires protection, scratch pants can be a practical addition to your wardrobe. Before you start making your scratch pants, gather the materials and tools you will need.
Materials:
- Durable fabric: Look for a fabric that is resistant to tearing and can withstand rough use. Canvas or denim are good choices.
- Thread: Choose a thread that matches the color of your fabric for a seamless look.
- Elastic: You will need elastic for the waistband and possibly the leg cuffs, depending on your design.
- Buttons or snaps: These will be used for the closure of your pants.
- Optional: Patches or reinforcements for high-wear areas.
Tools:
- Sewing machine: While it is possible to sew your scratch pants by hand, a sewing machine will make the process much quicker and easier.
- Scissors: You will need sharp scissors for cutting the fabric and thread.
- Measuring tape: This will help you take accurate measurements and ensure a proper fit.
- Pins: Pins will be used to hold fabric pieces together while you sew.
- Iron: An iron will be used to press the fabric and create crisp seams.
Once you have gathered all the necessary materials and tools, you will be ready to start making your scratch pants. Prepare your fabric by washing and drying it according to the manufacturer's instructions. Then, lay out the fabric and use your measuring tape to take your measurements.
Measure your waist, hips, inseam, and any other relevant dimensions. Use these measurements to create a pattern or modify an existing pants pattern to fit your body. Remember to add extra room for ease of movement and wearing them over other clothing if necessary.
Next, lay out your fabric and pin your pattern pieces to it. Carefully cut out the fabric, following the pattern lines. Be sure to cut two front pieces, two back pieces, and any additional pieces for pockets or reinforcements.
Now it's time to start sewing. Begin by sewing the front and back pieces of the pants together at the inseam. Use a straight stitch and reinforce the seam at the beginning and end. Press the seam open with an iron to create a neat finish.
Next, sew the side seams of the pants, leaving room for the waistband and closure. Again, reinforce the seams and press them open. Now is also a good time to add any reinforcements or patches to high-wear areas like the knees or seat of the pants.
Once the main body of the pants is complete, it's time to create the waistband. Fold the top edge of the pants over to create a casing for the elastic. Sew along the folded edge, leaving a small opening to insert the elastic. Measure your waist and cut the elastic accordingly. Use a safety pin to thread the elastic through the casing, then sew the ends of the elastic together and sew the opening closed.
Finally, add the closure to the pants. If you're using buttons, sew buttonholes on the fly extension and buttons on the waistband. If you're using snaps, attach them to the waistband and fly extension according to the manufacturer's instructions.
With these materials and tools, you can create your own scratch pants tailored to your needs. Remember to take accurate measurements, sew with care, and enjoy the process. Happy sewing!
Creating Pants with Volume: A Definitive Guide to the Perfect Flare
You may want to see also
![]()
Taking Measurements and Creating a Pattern

In order to make a pair of scratch pants, it is important to first take accurate measurements and create a pattern. This will ensure that the pants fit properly and are comfortable to wear.
To begin, you will need a measuring tape, a pencil, and a sheet of pattern paper or any large sheet of paper. It is also helpful to have a friend or family member to assist with the measuring process.
Start by taking the measurements of your waist, hips, inseam, and desired length of the pants. For the waist measurement, wrap the measuring tape around the narrowest part of your waist, typically between your ribcage and belly button. Write down the measurement.
Next, measure your hips by wrapping the tape around the widest part of your hips and buttocks. Again, write down the measurement.
To determine the inseam measurement, which is the length from your crotch to the bottom of your leg, stand up straight and measure from the crotch area to the desired length of the pants. This can be done by holding the end of the measuring tape at your crotch and letting it hang down to your desired length.
Lastly, measure the length of the pants by starting at your waist and extending the measuring tape down to your desired length. This measurement will vary depending on whether you want full-length pants, capris, or shorts.
Once you have all the measurements, it's time to create the pattern. Lay out the large sheet of paper on a flat surface. Starting with the waist measurement, measure and mark the top edge of the paper. Use a ruler to draw a straight line across the paper.
Next, measure and mark the hip measurement. Use the ruler to draw a line parallel to the top edge, making sure it is the same distance as the hip measurement from the top line.
Measure and mark the inseam measurement from the top line down the left side of the paper. Use the ruler to draw a straight line from the top to the point of the inseam measurement.
To create the width of the pants, measure and mark halfway between the waist and hip measurements. Draw a curved line connecting the waist and hip lines, making sure to create a smooth, even curve.
To determine the length of the pants, measure and mark the desired length from the bottom of the inseam line. Use the ruler to draw a straight line from the bottom of the inseam line to the desired length mark.
Lastly, add seam allowance to the pattern. This can vary depending on personal preference, but a common seam allowance is ½ inch. Use the ruler to draw a second line outside the original pattern lines, adding the desired seam allowance.
Once the pattern is complete, cut it out and use it as a guide to cut the fabric for your scratch pants. Be sure to follow the pattern carefully and cut the fabric accurately to ensure a proper fit.
Taking accurate measurements and creating a pattern is an essential step in making scratch pants. With a well-fitting pattern, you can confidently sew a pair of pants that will be comfortable and stylish.
Tips and Tricks to Quickly Break in Stiff Pants
You may want to see also
![]()
Cutting and Sewing the Pants

Once you have measured and traced your pattern onto the fabric, it's time to start cutting and sewing your scratch pants. Here is a step-by-step guide to help you through the process:
- Start by carefully cutting out the pattern pieces from the fabric. Make sure to follow the lines precisely to ensure accurate sizing and fit.
- Once all the pieces are cut out, use a serger or a zigzag stitch on your sewing machine to finish the raw edges of each piece. This will prevent fraying and add durability to your pants.
- Take the front and back pant pieces and place them right sides together. Then, sew along the inseam and outer leg seam of each leg, using a straight stitch and a ⅝ inch seam allowance. Press the seams open with an iron.
- Next, take the two leg pieces and place them right sides together. Line up the center crotch seam and sew from the front rise to the back rise. Again, use a straight stitch and a ⅝ inch seam allowance. Press the seam open.
- Now, fold over the waistband by about 1 inch and iron it down. Then, fold it over again by another 1 inch and iron it down once more. Pin the waistband in place.
- To create the elastic casing for the waistband, sew a straight stitch along the bottom edge of the waistband, leaving a small opening to thread the elastic through later. Be sure to backstitch at both ends of the opening to secure the stitching.
- Measure and cut a length of elastic that is slightly smaller than your waist measurement. Attach a safety pin to one end of the elastic and thread it through the waistband casing, being careful not to twist it. Once the elastic is threaded through, overlap the ends and sew them together securely.
- Close the opening in the waistband casing by sewing a straight stitch across it.
- Lastly, hem the bottom of the pants to your desired length. Fold over the raw edge by about 1 inch and press it down. Then, fold it over again by another 1 inch and press it down once more. Pin the hem in place and sew a straight stitch all the way around.
And there you have it! Your scratch pants are complete and ready to be worn. Enjoy the comfort and style of your handmade creation.
The Ultimate Guide to Aviator Utility Jogger Pants: Fashion Meets Function
You may want to see also
![]()
Adding Finishing Touches and Trying on the Pants

After putting in the hard work to sew your own scratch pants, it's time to add some finishing touches and try them on. These final steps will make your pants look polished and ensure they fit you perfectly. Let's get started!
Hemming the pants:
- Measure the desired length for your pants and mark it with pins or chalk.
- Turn your pants inside out and fold the fabric up to the marked line.
- Pin the fabric in place, making sure it is even all the way around.
- Using a sewing machine or needle and thread, sew along the edge of the folded fabric, securing the hem in place.
- Trim any excess fabric close to the stitching.
- Repeat the process for the second leg.
Adding a waistband:
- Measure the circumference of your waist and add an extra inch for seam allowance.
- Cut a piece of fabric or elastic to match the measurement you obtained.
- Fold the waistband fabric in half lengthwise, wrong sides together, and press it with an iron.
- Pin the waistband to the top of the pants, matching the raw edges.
- Sew along the raw edges, leaving a small opening for inserting the elastic.
- Thread the elastic through the waistband, using a safety pin attached to one end.
- Adjust the elastic to your desired waist size and secure the ends together with a few stitches.
- Sew the opening closed, making sure to catch all layers of fabric.
Finishing touches:
- Trim any loose threads or excess fabric from the pants.
- Give the pants a final press with an iron, paying attention to the seams and waistband.
- Try on the pants to ensure they fit properly and make any necessary adjustments.
- If desired, you can add additional details such as pockets, decorative stitching, or embellishments.
Congratulations! You have successfully created your own pair of scratch pants. By following these steps, you've added the finishing touches that make your pants look professional and tailored to your body. Wear them with confidence and enjoy the satisfaction of making your own clothing.
How to effectively use Iron Out on gray baseball pants
You may want to see also
Frequently asked questions
To make scratch pants, you will need fabric, a sewing machine or needle and thread, scissors, a measuring tape, and a pattern or template.
You can find scratch pants patterns or templates online, in sewing books, or even create your own by tracing a pair of pants that fit well.
Yes, you can make scratch pants without a sewing machine by using a needle and thread to hand sew the pants together. It may take more time and effort, but it is still possible to create scratch pants by hand.
Scratch pants can be a more advanced sewing project, but with patience and practice, beginners can accomplish making them. It's important to start with a simple pattern and take your time following the instructions carefully.