Are you tired of your stuffed animals wearing the same old boring outfits? Why not step up their fashion game and make them some adorable pants?! Not only will it give them a fresh new look, but it will also bring out their unique personalities. In this guide, we'll show you step-by-step how to make these tiny pants, so your stuffed animals can strut their stuff with style!
| Characteristics | Values |
|---|---|
| Material | Soft and durable fabric |
| Size | Suitable for the stuffed animal's dimensions |
| Design | Elastic waistband for easy on and off |
| Decoration | Optional pockets or buttons |
| Color | Various options available |
| Care instructions | Machine washable on gentle cycle |
| Durability | Stitched seams for long-lasting use |
| Versatility | Can be worn by different stuffed animals |
| Safety | No small parts that can be swallowed |
| Comfort | Non-irritating for the stuffed animal's skin |
| Customization options | Ability to personalize with embroidery or patches |
| Price | Affordable and competitive |
| Availability | Sold in stores or online |
| Brand reputation | Trusted and reputable manufacturer |
What You'll Learn
![]()
Gather materials and supplies for making stuffed animal pants

When it comes to making stuffed animal pants, gathering the right materials and supplies is essential. Here is a list of what you will need:
- Fabric: Choose a suitable fabric for your stuffed animal pants. Cotton, flannel, or fleece are all great options that provide comfort and flexibility. Consider the size of your stuffed animal when selecting the fabric. You will need enough fabric to cover the legs of your stuffed animal.
- Sewing Machine: Unless you plan to hand-sew your stuffed animal pants, a sewing machine will make the process much faster and easier. Make sure your machine is in good working condition before you start.
- Thread: Choose a thread color that matches or complements your fabric. Cotton or polyester thread is ideal for sewing stuffed animal pants.
- Scissors: A pair of sharp fabric scissors is a must-have for cutting the fabric. Avoid using regular household scissors as they may cause fraying.
- Pins: Pins will help hold your fabric in place while you sew. Use straight pins or safety pins to secure the fabric layers together.
- Elastic: Elastic is necessary to make the waistband of the stuffed animal pants. Choose an elastic size that matches the waist size of your stuffed animal.
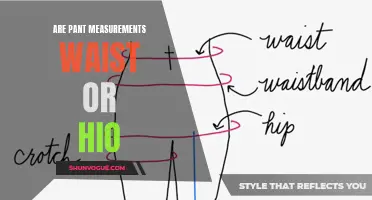
- Measuring Tape: A measuring tape will come in handy for taking measurements of your stuffed animal's waist and legs. This will help you determine the length and width of the pants.
- Marking tools: Fabric marking tools such as disappearing ink pens or tailor's chalk will help you mark the fabric for accurate sewing. These marks will guide you when sewing the pants.
- Optional: Decorations and embellishments such as buttons, ribbons, or appliques can be added to the stuffed animal pants for a personalized touch. These are not necessary but can enhance the overall look of the pants.
Before you begin making your stuffed animal pants, gather all these materials and supplies to ensure a smooth and efficient sewing process. Having everything ready beforehand will save you time and make the project more enjoyable. So get your materials together, and let's start crafting adorable pants for your stuffed animal!
Exploring the Availability of Black Pants at Kmart in Los Angeles
You may want to see also
![]()
Measure and cut fabric to the appropriate size for the pants

Making pants for a stuffed animal is a fun and creative way to personalize their wardrobe. Whether you are looking to dress up a teddy bear or a favorite plush toy, making pants is easier than you might think. In this blog post, we will guide you through the process of measuring and cutting fabric to the appropriate size for the pants. Let's get started!
Materials you will need:
- Fabric of your choice
- Measuring tape
- Scissors
- Pins
Step 1: Prepare your fabric
Before you start measuring and cutting, make sure your fabric is clean and free of any wrinkles. Iron it if necessary to ensure a smooth surface to work with.
Step 2: Measure your stuffed animal
Using a measuring tape, measure the length of your stuffed animal's legs from the waist down to the desired length of the pants. Write down this measurement as it will be used later.
Step 3: Measure the width of the legs
Wrap the measuring tape around the thickest part of your stuffed animal's leg to determine the width of the pants. Keep in mind that you want the pants to fit comfortably, so add a little extra to this measurement for ease.
Step 4: Calculate the fabric dimensions
To calculate the dimensions of the fabric for the pants, you will need to double the width measurement from step 3. This is because you will be folding the fabric in half to create the pants. For example, if the width of the legs measured 4 inches, you will need to cut a piece of fabric that is 8 inches wide.
Next, you will need to determine the length of the fabric for the pants. Take the measurement from step 2 (the length of the stuffed animal's legs) and add a few inches for the waistband and hem allowance. For example, if the length of the stuffed animal's legs measured 6 inches, you might want to add an additional 2 inches for the waistband and hem allowance, making the total length 8 inches.
Step 5: Cut the fabric
Using the measurements you just calculated, cut a piece of fabric that matches those dimensions. For example, if you determined that you needed a piece of fabric that is 8 inches wide and 8 inches long, cut a square piece of fabric that measures 8 inches by 8 inches.
Step 6: Pin the fabric together
Fold the fabric in half widthwise, with the right sides of the fabric facing each other. Pin the edges together to hold them in place while you sew.
Step 7: Sew the pants
Using a sewing machine or a needle and thread, sew along the pinned edges, leaving the waistband and leg openings open for now. Be sure to backstitch at the beginning and end of your seam for added durability.
Step 8: Trim and finish the edges
Trim any excess fabric from the seam allowance, leaving about 1/4 inch. Then, finish the raw edges of the fabric to prevent fraying. You can use a serger, a zigzag stitch, or even pinking shears for this step.
Step 9: Turn the pants right side out
Carefully turn the pants right side out through the waistband opening. Use a pencil or your fingers to push out the corners and smooth the seams.
Step 10: Try the pants on your stuffed animal
Slip the pants onto your stuffed animal's legs to check the fit. Adjust the waistband if needed by folding it over and adding a stitch to hold it in place.
With these easy-to-follow steps, you can now create adorable pants for your favorite stuffed animals. Get creative and experiment with different fabrics, patterns, and designs to make each pair of pants unique. Have fun accessorizing your stuffed animals and giving them a wardrobe they'll love!
The Guide to Finding Extra Long Women's Dress Pants
You may want to see also
![]()
Sew the fabric pieces together to create the pants shape

To make stuffed animal pants, you will need some basic sewing skills and a few materials. One important step in this process is sewing the fabric pieces together to create the pants shape. Here's a step-by-step guide on how to do it:
- Start by laying out your fabric pieces on a flat surface. You will need two identical pieces for the front and back of the pants.
- Place the two fabric pieces with their right sides facing together. Line up the edges and pin them in place to ensure they don't shift while sewing.
- Using a sewing machine or a needle and thread, sew along the curved crotch line of the pants. Start sewing from the waistline and stop at the opposite end of the crotch line. Make sure to backstitch at the beginning and end of the seam to secure it.
- After sewing the crotch line, open up the fabric and lay it flat with the right side facing up. At this point, you should have a single fabric piece that resembles half of the pants.
- Fold the fabric piece in half vertically, with the right sides facing each other. Line up the edges and pin them together starting from the waistline down to the bottom hem of the pants.
- Sew the pinned edges together, starting from the waistline and moving towards the bottom hem. Remember to backstitch at the beginning and end of the seam to secure it.
- Once you have sewn both sides, turn the pants right side out. You should now have a basic pants shape.
- To create the waistband, fold down the top edge of the pants about 1 to 1.5 inches and pin it in place. This will depend on the desired width of the waistband.
- Sew along the bottom edge of the folded fabric, leaving a small opening to insert the elastic.
- Insert the elastic into the waistband using a safety pin or a bodkin. Make sure the elastic is slightly shorter than the waist measurement of your stuffed animal to provide a snug fit.
- Once the elastic is inserted, sew the opening closed to secure the elastic in place.
- Finally, try the pants on your stuffed animal to check the fit. If necessary, make any adjustments by taking in or letting out the seams as needed.
By following these steps, you can sew the fabric pieces together to create a pair of pants for your stuffed animal. Enjoy the process and get creative with different fabric choices and embellishments to make your stuffed animal's pants unique and adorable.
Stylish Pairings: How to Rock a Leather Jacket with Dress Pants
You may want to see also
![]()
Add finishing touches, such as elastic waistband and decorations, to the stuffed animal pants

Adding finishing touches to stuffed animal pants is an enjoyable task that can really bring your creation to life. From attaching an elastic waistband for a secure fit to adding decorative details, these final steps will help complete your project. In this guide, we will walk you through the process of adding these finishing touches and ensure your stuffed animal pants look polished and professional.
Before you begin, gather all the necessary materials: a sewing machine, thread, scissors, pins, elastic, and any decorative elements you want to add.
First, let's start with the elastic waistband:
- Measure the waist of your stuffed animal and cut a piece of elastic that is slightly smaller than the measurement. This will ensure a snug and secure fit.
- Fold the waistband over about 1 inch to create a casing for the elastic. Pin it in place.
- Sew along the bottom edge of the folded waistband, leaving a small opening at one end to insert the elastic.
- Attach a safety pin to one end of the elastic and thread it through the casing. Use the safety pin to guide the elastic all the way around the waistband until it comes out of the opening.
- Overlap the two ends of the elastic by about 1 inch and sew them together securely. Trim any excess elastic.
- Finally, sew up the opening in the waistband, ensuring that the elastic is not twisted. Backstitch at the beginning and end of your sewing to reinforce the seam.
Now that the elastic waistband is in place, let's move on to decorations:
- Determine where you want to add decorative elements, such as buttons, appliques, or embroidery. You can place them on the front, sides, or back of the pants, depending on your desired design.
- If you're adding buttons, sew them securely to the pants, making sure they are attached firmly. You can use a sewing machine or hand stitch them, depending on the size and style of the buttons.
- If you're using appliques, carefully position them on the pants and pin them in place. Sew around the edges of the appliques, either by hand or with a sewing machine, to secure them onto the fabric.
- For embroidery, use a fabric marker or pencil to lightly sketch your design onto the pants. Then, choose a suitable embroidery thread and stitch over the sketched lines, following your design. Take your time and make neat, even stitches.
- Once you have applied your desired decorations, give the pants a final press with an iron to smooth out any wrinkles.
Congratulations! You have now successfully added finishing touches to your stuffed animal pants. The elastic waistband ensures a snug fit, while the decorative elements make your creation stand out. Take a step back and admire your finished work – your stuffed animal will love their stylish new pants!
7 Simple Tips to Make Polyester Pants Bigger
You may want to see also
Frequently asked questions
You will need fabric, a sewing machine or needle and thread, scissors, and elastic.
Measure the length from the top of the stuffed animal's waist to the desired length of the pants. Then measure the width around the waist of the stuffed animal.
It is not necessary to have a pattern, but it can make the process easier. You can use an existing pair of doll or baby pants as a pattern or search for free patterns online.
It is best to use a lightweight fabric, such as cotton or flannel, that is soft and comfortable for the stuffed animal.
To attach the elastic, fold over the top edge of the pants to create a casing. Leave a small opening to thread the elastic through, and then secure the ends of the elastic together before closing the opening.